Hello and welcome to my blog. This post is a continuation of a series in which I am building a part of medicine cabinets in white cypress and currently working on the doors. Today’s post will revolve around the cut out of the upper door rail, detailing of the frame and cutout of the door access.
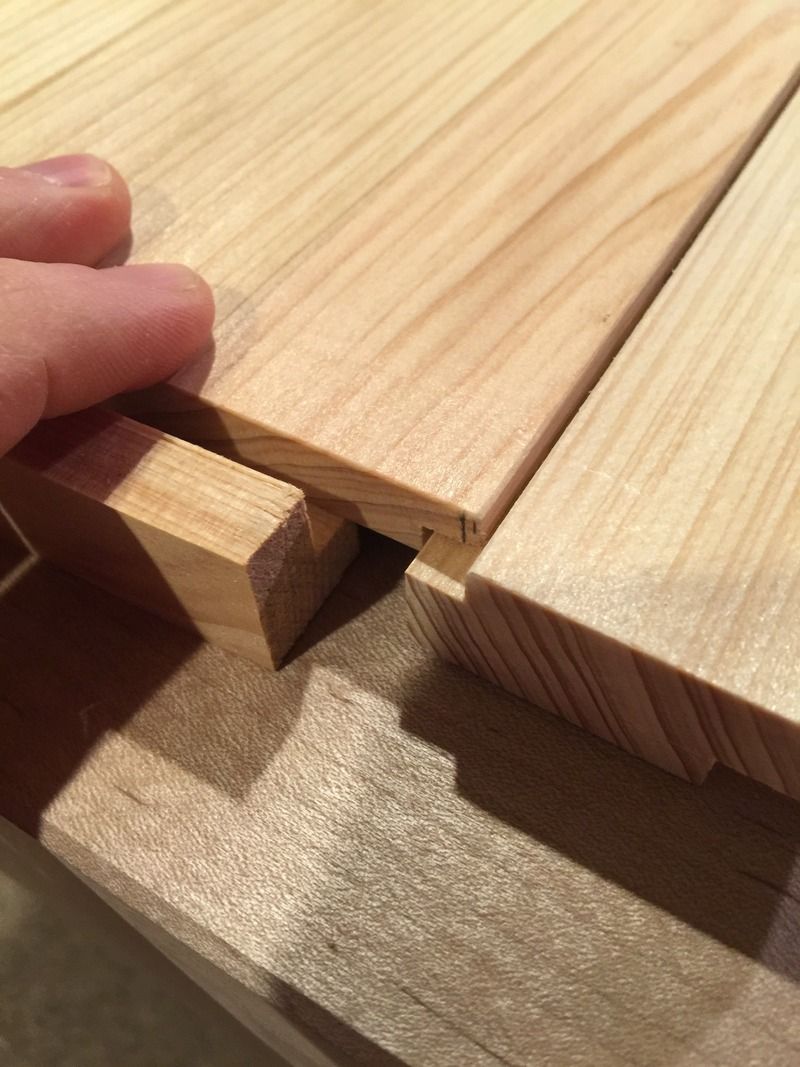
The bottom rail is thicknessed to size and I’ve roughed out the rabbet. I will find tune until it slides under the panel.

I’m fine tuning the fit with a shoulder plane.

Once the rabbet is appropriately sized I create a groove with the dado plane to house the panel. The groove is 1/4″ thick, and so the panel will be cut to fit.


This photo illustrates exactly where the groove will need to be made in the panel to fit in with the rail.

Next the joinery is laid out on the stiles to ensure that I am cutting everything as I should be, any incorrect moves at this point would mean a lot of rework.

Next the outside stile is removed and the groove applied to the inside stile and to the panel.

I’m aiming at a gauge line in this instance because I do not have something for my fence to rest on.
I finish the job by trimming back the edges so that they do not chip-out when the groove is cut to height.


A test fit provides a double check on my height dimension.

Now moving onto joinery. I start by cutting out with the saw, most of the joinery is blind so there are partial saw cuts. After wasting out the majority of that which is cut by the saw I will work with shearing and crossgrain cuts to remove the remainder. I will take this process slowly as hurried work can be disastrous.


This work moves along quickly although there are quite a number of steps. It’s important to be mindful of grain direction as you proceed. Going against the grain can cause excessive tearout.

Finally I’m trimming the height and making my detail cuts with the paring chisel.

And the work results in a finished joint.

The rail is then cut to fit.

And finally the backsides relieved to accommodate the inside of the cabinet. This will be further tuned up after the glue up.

Tuning up my chisels while the glue sets so that I’m prepared to make my detail cuts.

Detail work is now complete. I will also make note that I have shellacked all surfaces that did not receive glue before the glue up.


Now onto the cutout for the handle relief.

I want absolutely silky smooth saw cuts, so I mocked up a block and used a flush cut saw to make my cuts.

Then I wasted out everything with a chisel. My paring chisels are very sharp and thus can leave finished surfaces with a nice sheen so long as I’m cutting with the grain.

I can see the finish line from here, but I have a few key things left to complete. Next will be the back panel, which is near completion but needs a bit more work, then I will be cutting for the hinges.
I have hinges on hand, but have decided to order a new set which will arrive in a few days. The new set are slimmer and will allow me to set them back further into the case. The only part which will be revealed are the pivots.
If all other work is complete, then in the interim I will work on the cutout in the wall which needs drywall detailing.
Thank you for visiting, I hope to see you again soon.
The Medicine Cabinet – Completed
Beautiful work Brian, so finely detailed and documented. It’s so refreshing to see some novel creations, and I am greatly admiring your refined aesthetic. Thank you for putting in the time and effort into sharing this!
Jason
Thank you Jason! My pleasure, glad you are enjoying!
Pingback: Medicine Cabinet – Doors Part IV | Brian Holcombe Woodworker
Pingback: Medicine Cabinet - Doors Part IV - Brian Holcombe Woodworker