Hello and welcome to my blog! This post completes a series in which I am building a live edge tsuridana, of American black walnut, for installation into a contemporary Japanese house. In the previous post the tsuridana was brought to dimension, finish planed, and a large rabbet was cut around the front edge to facilitate a series of battens. These battens will help to ensure that the slab remains flat during seasonal humidity changes.
This project brings to mind my first profound interaction with studio furniture, one that grabbed my attention and never let go. In a trip to my local exotic hardwoods lumberyard, I came across a desk in the minguren style. The desk, while simply designed with a slab top supported by an architectural base and featuring a single drawer, stopped me in my tracks. I recall looking at the heavy bridle joints with a sense of wonderment, operating the drawer which worked smoothly and admiring the top which displayed so beautifully a glimpse into the tree’s life. I must have stood staring for quite a long while.
What struck me as much as the furniture was the maker; while obviously looking in on a curious kid, he was generous in the explanation of his work and reasons for utilizing only wooden parts along with building in way which would be able to be repaired and restored in the future. The explanation made so much sense to me that when I began building furniture I was determined to do the same.
In approaching my work with that same logic I have worked to continuously improve my product and process. In this build that approach means working toward a way to batten a slab without screws. I’ve decided to apply dovetailed battens, without taper, and lock them in place at one location which will allow the slab to grow and shrink with seasonal humidity changes while the channeled batten performs its function.
Before I begin work on the battens, I’m taking the final steps needed to finish up the slab. Here I am edge jointing the back of the slab.

Next, the edges around the top of the slab are chamfered.

Finally I can begin work on the battens, the first step is to saw the material to rough dimension. I’m using the flat sawn face on the sides of the batten. The flat sawn orientation offers more resistance to bending forces and so I’ve placed it on its side to stiffen the batten against cupping forces applied by the slab.


After which I surface and square the stock on four sides, followed by cutting dovetails on the bottom of the battens.

Next I cut trenches for the battens, followed by cutting the sides into a dovetail shape. I finish this work by cleaning up the bottoms with a router plane.

The battens are next fitted into place with a slight bit of tuning to the side of the groove and that of the batten until the two mesh nicely.

Next, I begin cutting tenons which will lock the batten in place. I start by splitting walnut to get a straight grain orientation.

Then I plane the splits down to dimension.

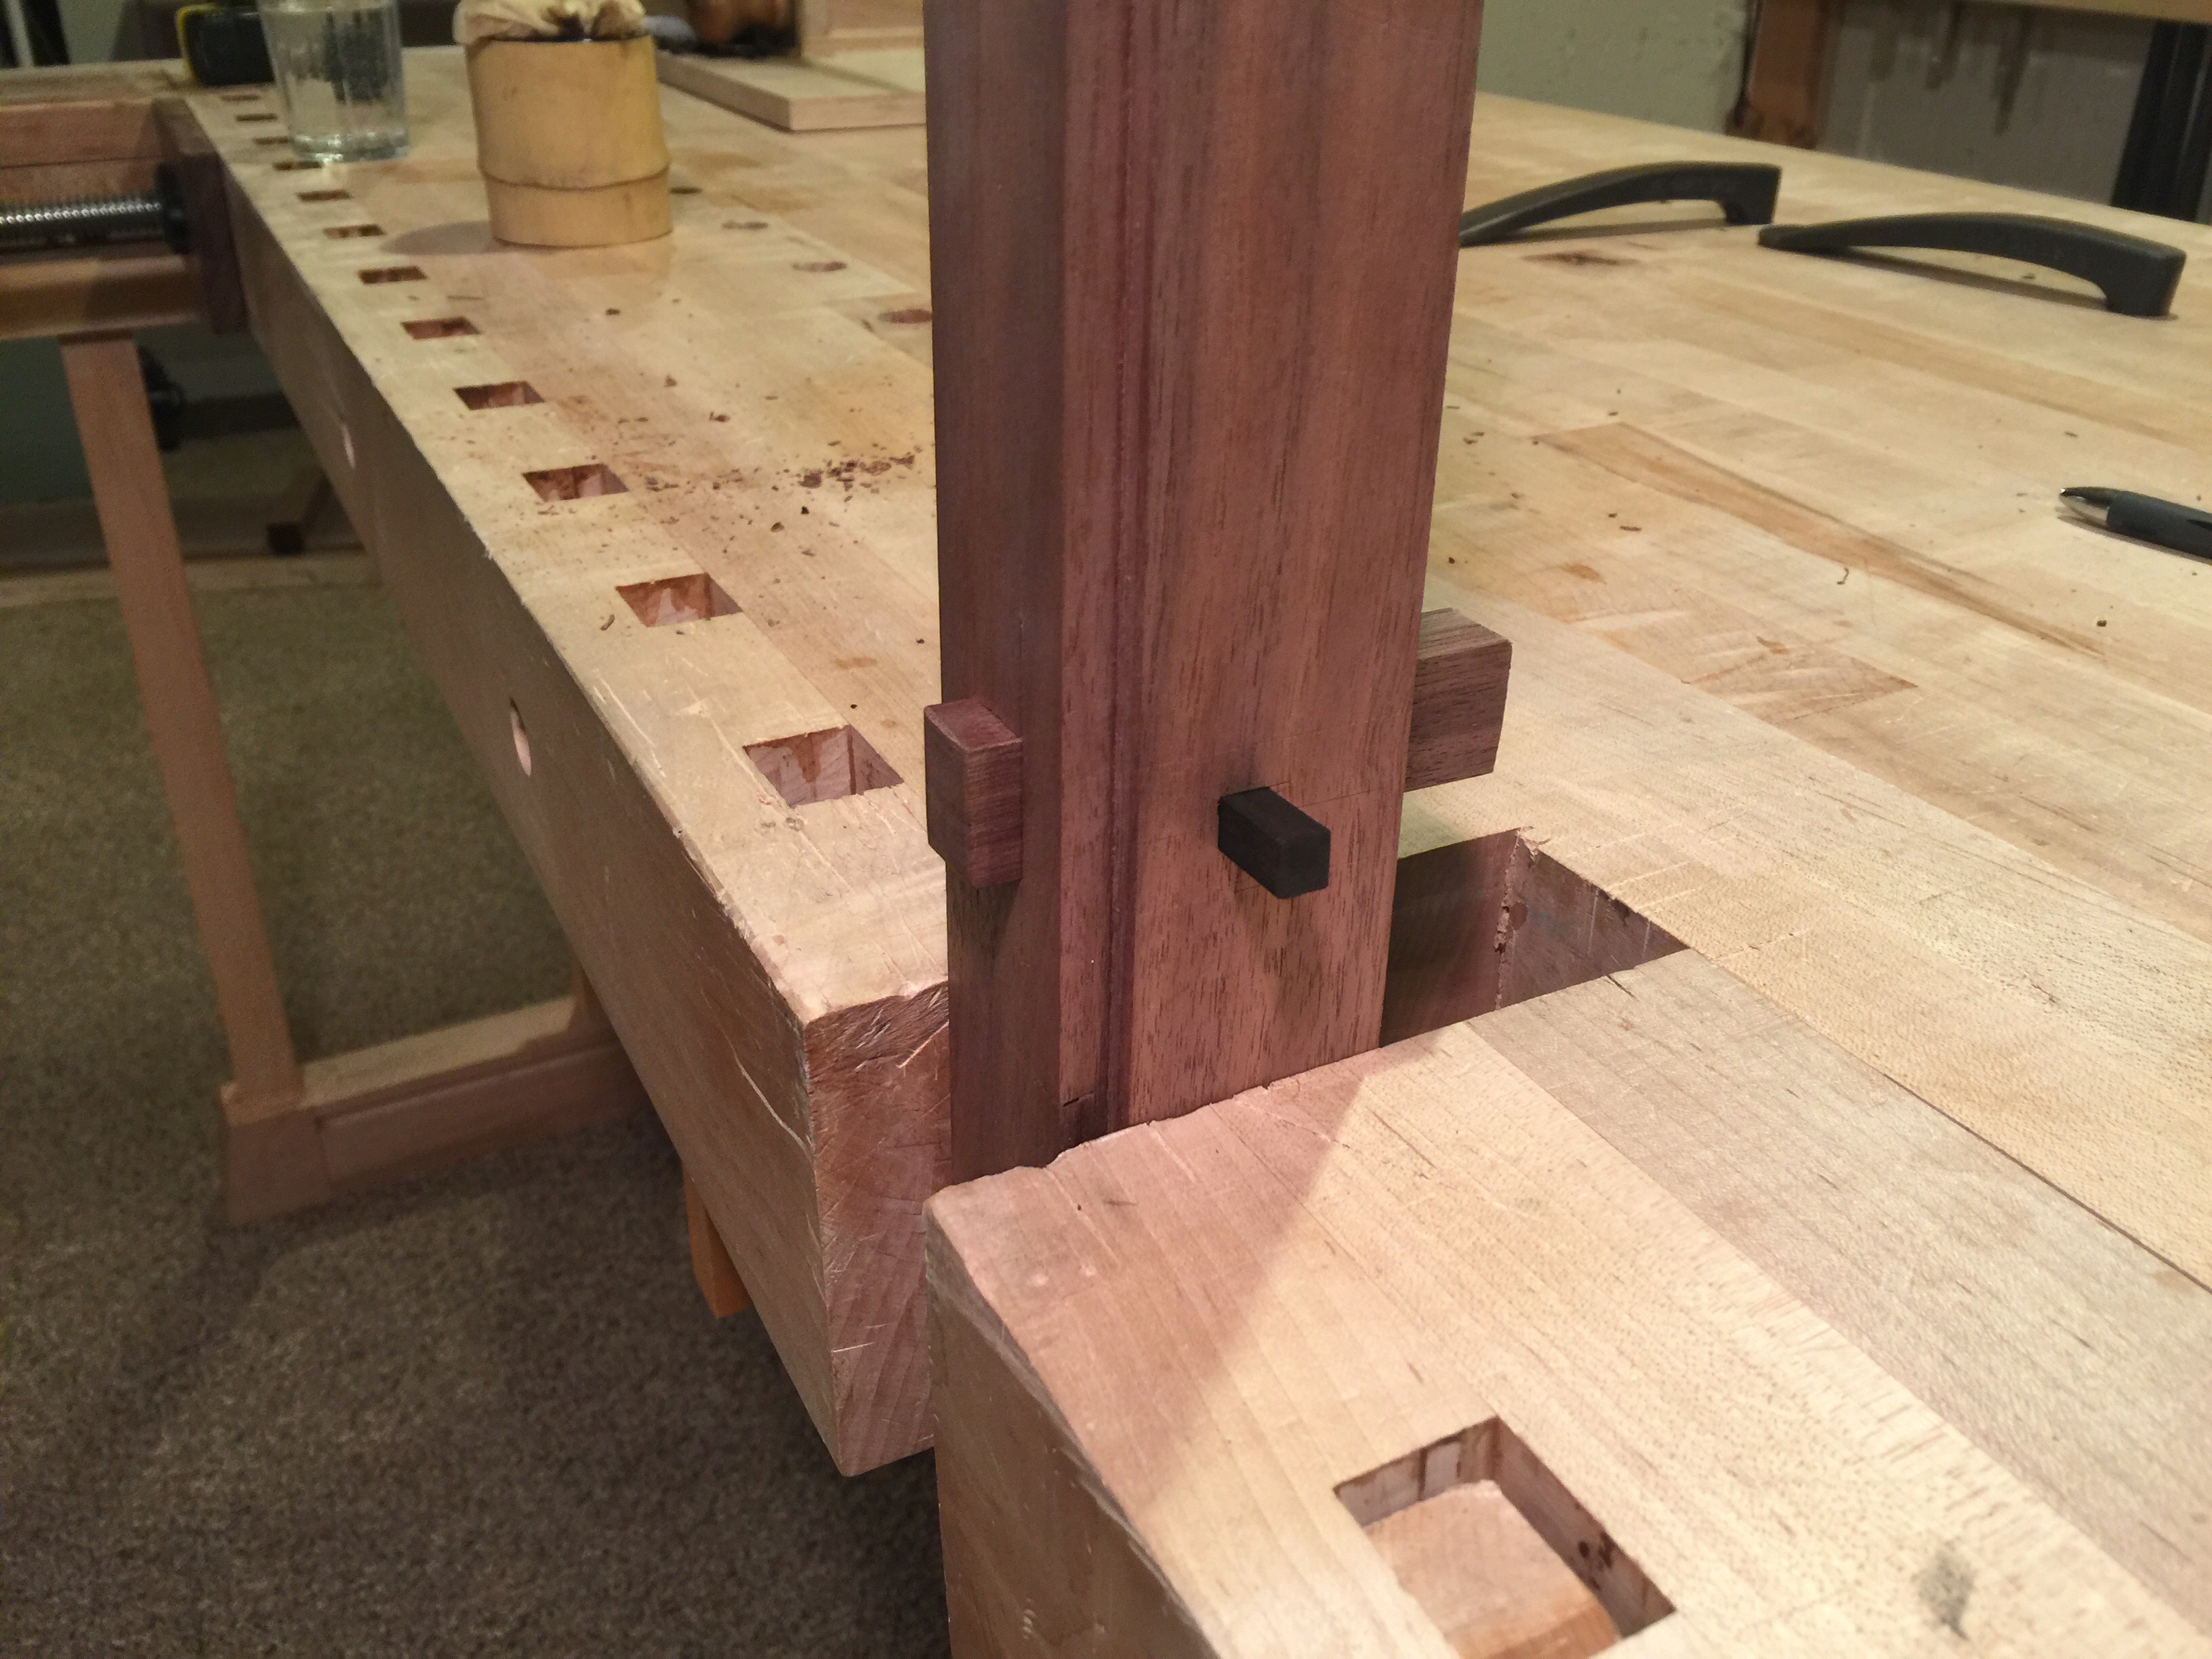
Next I mark out the batten, then cut out the mortise. This is for a through tenon and so the first step I take is to drill one hole through the mortise. After which I chop in toward the center from top and bottom.

Next I pare away any high spots inside the mortise.

Finally I fit the tenon. The tenon, in this case was slightly oversize and so I was able to take a few plane swipes to fit it. My aim was a snug fit, but one that did not require a mallet so that the tenon could be removed in the future.

The tenon is free floating, and so it must be locked into place. I chose to use a wedged peg to lock in the free floating tenon. First I mark it out, with a knife, then drill a hole through from both ends.

Followed by squaring up the sides. I cut for a slight taper, the wedging affect will lock the tenon in place.

Next I cut and fit a gaboon ebony peg to secure the tenon in place.

The tenons were removed, the batten again fitted into place and marks were transferred from the interior of the batten’s mortise to the slab. A shallow mortise was then cut.

This mortise will house the protruding end of the through tenon.

The fully assembled joint, with tenon locking it in place and then pegged. I cut the battens to a profile which allows them to disappear when viewing the shelf from standing height once it is installed.

All three battens in place and shelf from the bottom.

All exposed edges are chamfered.

Showing the carved in end grain detail and exposed dovetail.

Next the surface is to be finished, filling knots and detailing exposed features.

The slab is nearly finished and awaits a few final coats of shellac and installation into the mizuya.

Thank you for joining me, I hope that you have enjoyed following along.
Installed:


Brian, wonderful pictorial description, as usual. Hopefully you can explain or illustrate to us how this tsuridana is held into its final location. I sort of doubt you will be using sheetrock screws and angle brackets…
Thanks John! Haha, lots and lots of Sheetrock screws would do the job, no? There are two flat bar steel supports embedded into and protruding from the walls, I plan to reuse those. I’ll use slotted brass screws to secure the slab to the supports.
Brian,
If the customer wouldn’t mind, might you be able to post a picture once the tsuridana is installed in their kitchen? I’m having difficulty picturing how this will look when in place. I understand it is a shelf, but not one I’m familiar with.
Stunningly beautiful
Thanks Jim!
Nice work Brian, I like the carving detail on the end grain of the battens. Carving/texture can add a lot to a piece even if it’s subtle.
-Jon
Thanks Jon! I agree and I’ve found a lot of inspiration in your carving work.
Wow excellent! And I’ve found a lot of inspiration in your work as well. After seeing a few of your posts I’m eager to attempt cutting sliding dovetails by hand. I haven’t found any Japanese planes for cutting the male portion of the dovetail, how do you like your ECE plane for dovetails?
Thank you! Glad to hear that you have found inspiration in my work! Sliding dovetails by hand is quite enjoyable, I believe most Japanese dovetail planes are setup for both the male and female portions of the joint, with a removable fence. That said the ECE plane works quite well with the modification that I made to increase the angle.
Pingback: Live Edge Tsuridana | Brian Holcombe Woodworker
Hi Brian,
Very nice work again. I too like the work you’ve done on the underside – batterns and their detailing, the rebate, etc.
Iain
Thank you!
Excellent!
What is the thinking behind thinning the live edge? Was it to expose the ends of the dovetails?
Thanks Brandon! Exactly, and also to set them back from the front edge so that they’re unobtrusive.
Pingback: Ishitani Furniture Pierces My Hardened Heart – WoodProx
Pingback: Ishitani Furniture Pierces My Hardened Heart - Twelve 27 Shop
Pingback: Ishitani Furnishings Pierces My Hardened Coronary heart - EasyTravel