Hello and welcome to my blog! This post continues a series in which I’m building an outdoor bench for a tea house garden. I will begin to detail the process of cutting the joinery used to construct this bench.
The main feature of this bench will be a Japanese timber framing joint known as sao-shachi-sen-tsugi, or wedged key rod tenon. That sounds complicated, but many timber framing joints are very specifically named. Rod tenon joints, which are typically used in traditional Japanese timber framing work to join a floor beam to a column, can be cut out in numerous ways and so their names are often quite detailed.
This joint wedges tightly around an upright making for a very secure connection. I’ve laid out the joint using both pencil and knife marks, this joint is one that is fairly intuitive but one must keep their bearings during cutout to prevent removing material where it should remain.

I’ve sawn and chopped out the waste forming two sides of the joint. On a typical tenon I will saw exactly at the line, but on such a long joint I give myself at least one shaving thickness to provide material to pare to a final fit.

The two sides now engage each other and the space between is set for the upright. I’ve yet to mark out for the shachi pins in order to ensure that I will be able to locate them accurately.

I then process a slab for the upright, working from rough stock to a finish by starting with a try plane then working through a jointer and finally a finish kanna.

Next, I marked the width to match the other two uprights and trimmed that down with a jack plane followed by a smoothing plane.

Finally I plane all of the uprights down to match the thickness of the bench top.

I’m working to maintain a continuous grain pattern on the outside of the bench. I’ve laid that out here to ensure that I have each piece correctly oriented.

Next I begin cutting out the joinery to receive the rod tenon into the center upright. This mortise calls for exacting precision and I began the process by way of careful layout with a marking knife and gauges.
I removed the majority of the waste by freehand routing in sequence starting with the center through mortise. This is followed by the short mortises along the sides, which I chopped and pared to my layout lines.

The stretcher is checked for fit. I ensure that the mortise at the inside of the upright transitions smoothly into the female side of the stretcher connection.

I also want to ensure that it is naturally sitting square.

The opposing side is similarly cutout. I’m very careful in this case about the two small mortises along the sides, wanting for a flat floor and so I scraped it flat with a bottom scraping chisel.

The joint now assembled, and awaiting layout for the shachi pins.

Once the layout lines are applied, I break apart the joint and begin cutting the two halves. The shachi pins are formed into a wedge shape along their width and thickness, the wedging along their width allows them to tighten the joint as they’re driven into their respective mortises.

After cutting the sides I quickly pare away the waste to form each groove.

I made a set of pins from Bubinga, then made another set of better fitting pins from bubinga and then seated the joint. Once I ensured that it drew together tightly, I separated the joint and began to focus my attention on the joinery between the center upright and the bench top. In the heat of battle I did not take many photos. The tenons were marked out and cut with a bias toward the outside of the bench.

This joint, called Jogoku-hozo or ‘hell’ tenons, referrers to an internally wedged tenon. I’ve cut the joint for wedges and drilled them at the bottom where possible. To ensure that they will seat nicely across the bench top, I have cut a full length shoulder around the joint.

After I finish cutting the tenons, I set the upright onto the bench top to begin laying out the mortises.

Once the mortises are cutout an angled batten is placed along the edges of the mortises and the mortise sides are chopped to match. The batten is angled at about 2 degrees, while the wedges are cut at 4 degrees. I’ve made the difference in angle to account for both the width of the saw kerf cut into the tenons and to allow for some compression of the wood as it assembles.

This bench is going to be used outside and so the joint is also glued with Titebond III creating a lamination in addition to a mechanical element.

The unnerving part of cutting out this joint is that once the cutout is made there can be no real test assembly. As one of the daiku who follow my instagram wrote “地獄ですね !”, or “It is hell!”. Once the wedges are in place, the joint is driven together, then held tight with clamps to ensure a square assembly until the glue cures. This joint creates an incredibly strong hold.

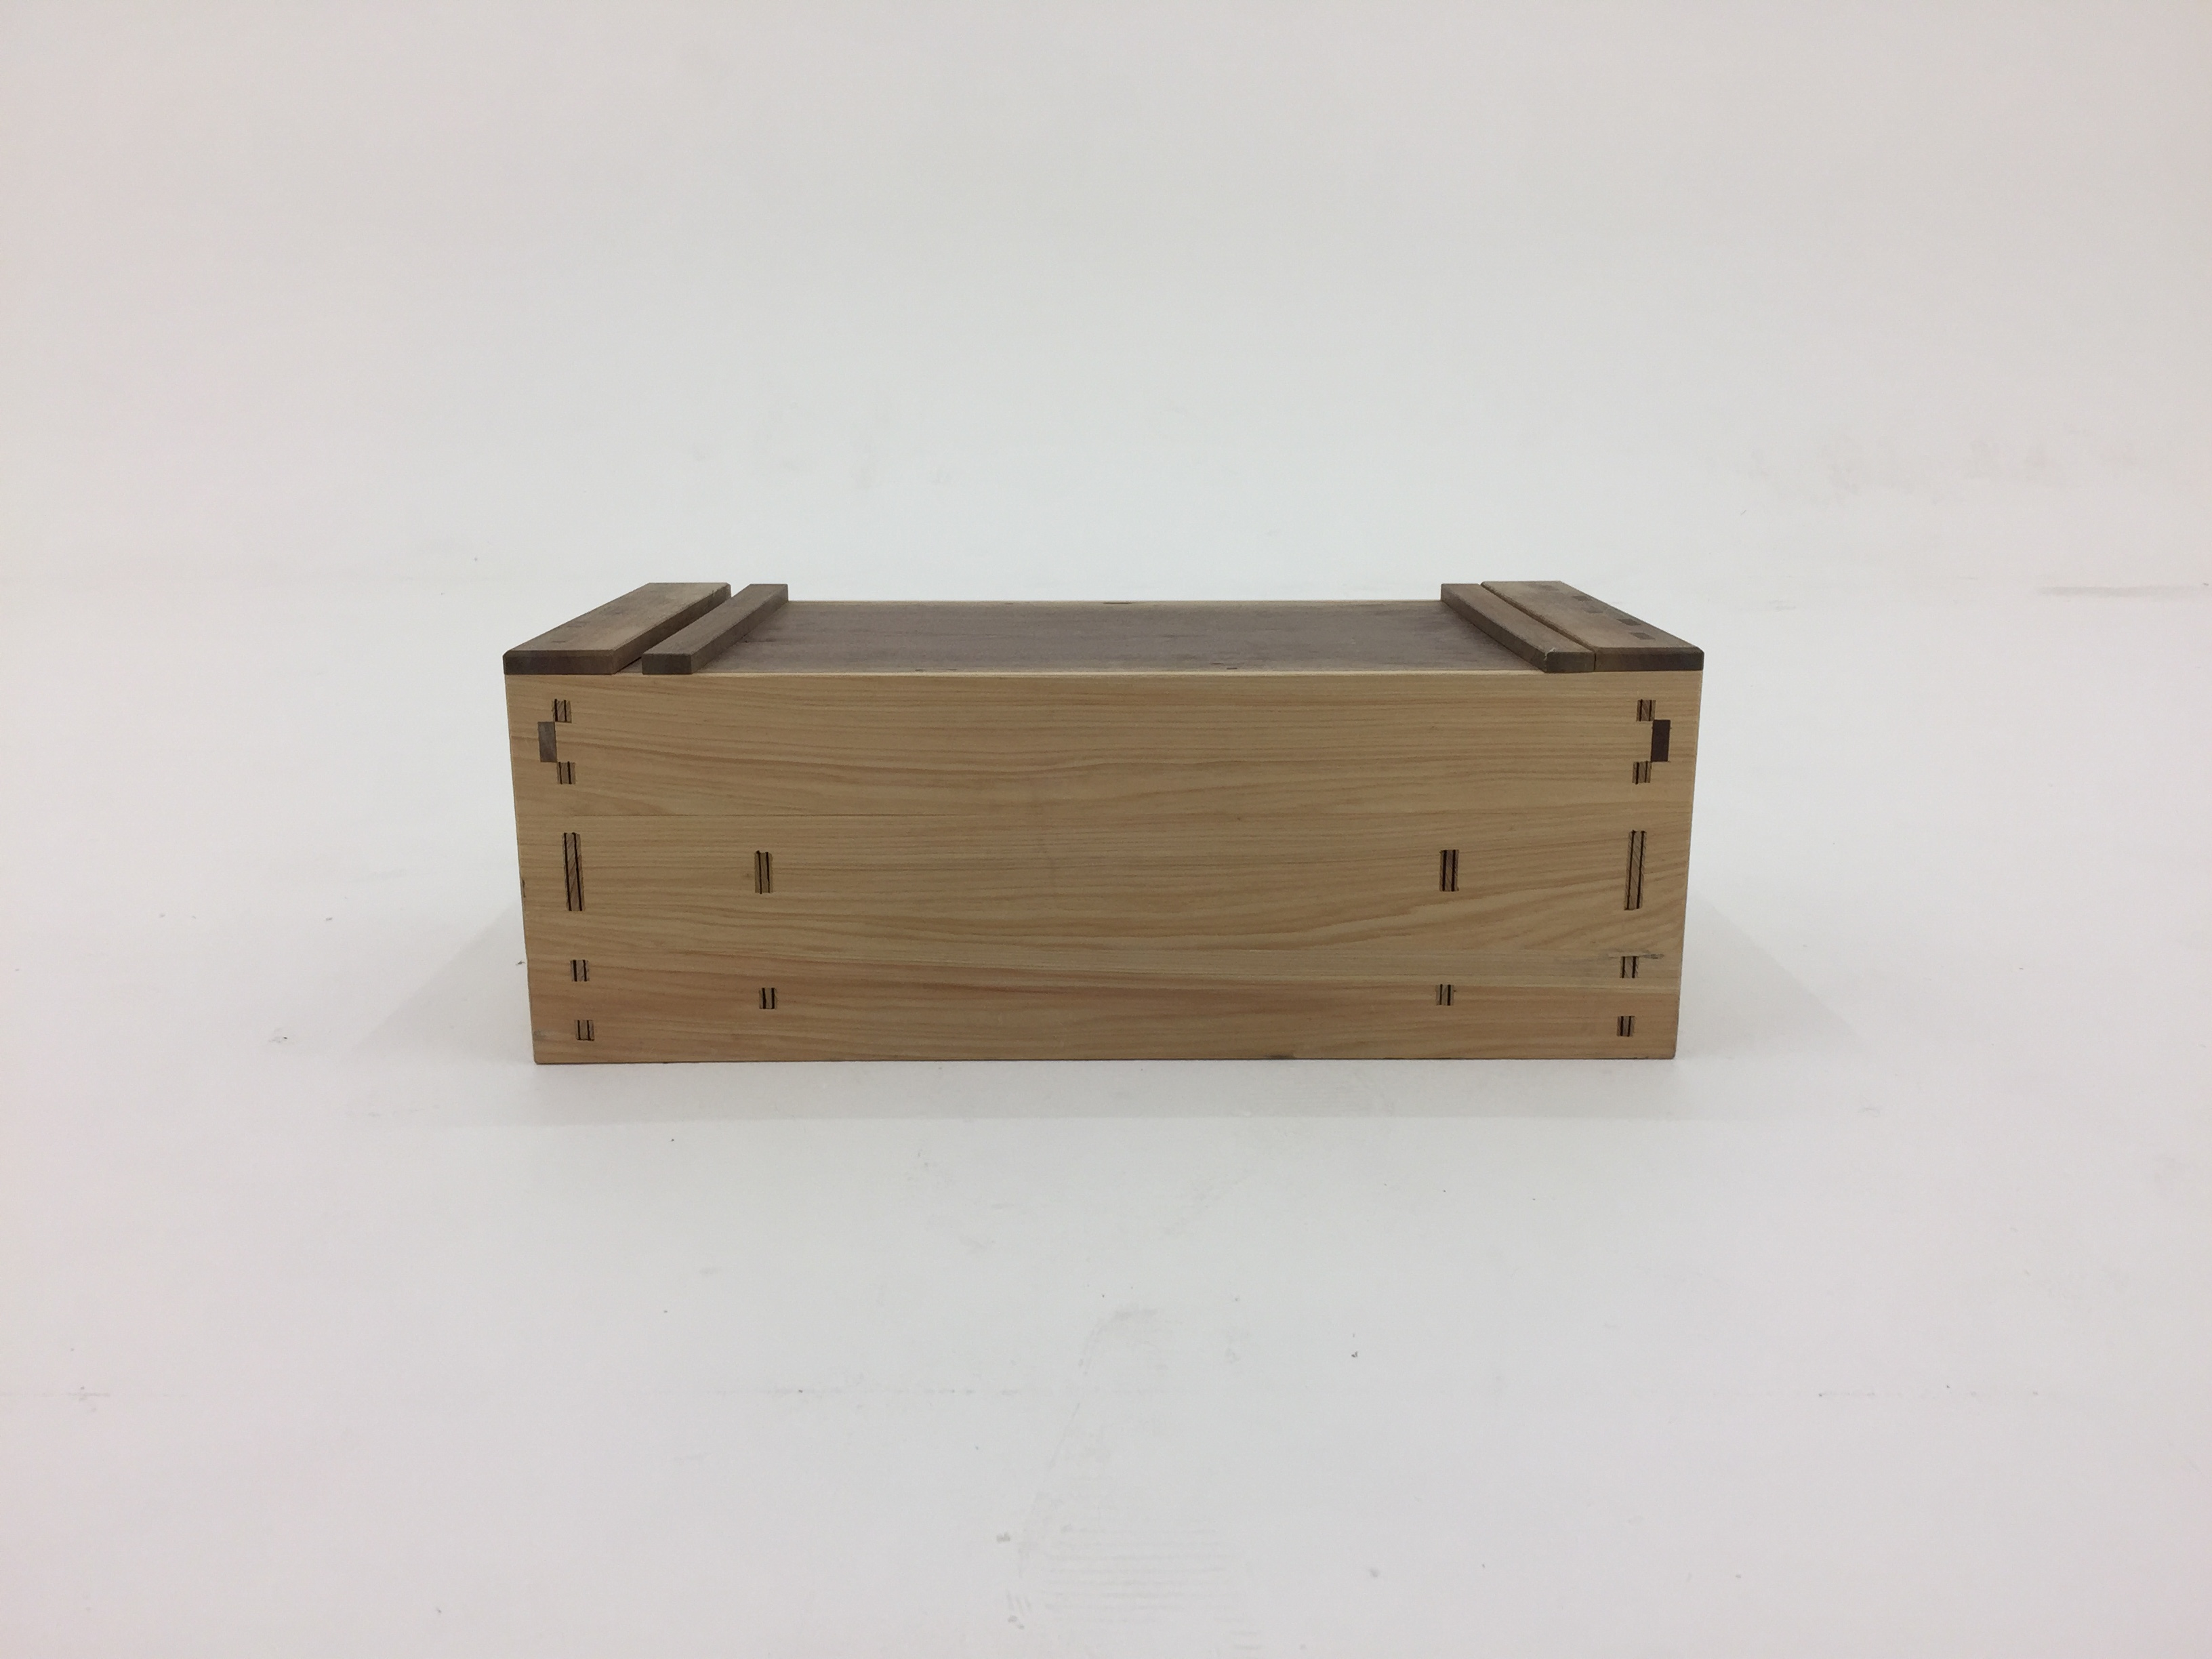
Prior to joining the center upright to the bench top I had cutout the large dovetails at the ends. To avoid confusion I detailed the entire process of the center upright joinery before moving to the end joints.
These dovetails are called setback dovetails, meaning the uprights at the sides of the bench will be set in from the sides and the exposed area of the dovetails detailed. They’re cut very similarly to normal dovetails.

Once cutout the tails are transferred to the uprights to scribe a layout for the pins.

The pins are then cutout.
Next I begin cutting toward the baseline, first with a crosscut saw to form the ends.

Followed by trimming up the sides to make use of my clamping position.

Then I move to the floor to cutout the waste between the pins.
In the next post I will detail the dovetail assembly and the stretcher to upright joinery used to secure the ends of the bench. Initially I had planned to use through-wedged tenons, I’ve since determined that a more suitable joint would be a cogged joint. Once I cutout the center upright joinery I decided that it would be asking too much to join two sets of large dovetails and a series of hell tenons all during the assembly glue-up process. using a cogged joint will allow me enough room to join in the ends without the need to assemble everything at once.
I hope that you have enjoyed following along, and I look forward to reading your comments.
Beautiful work as always mate. These posts are therapeutic as i’m sure the work is too.
Thank you Rhys! Indeed, this process is very enjoyable. It keeps the mental wheels turning which is what I enjoy most.
Neat joinery work (as usual). A question here: What was the advantage of inserting the wedges into the slots before the tenons were fit into the mortises?
Thanks Chuck! The mortises are blind and so the wedges need to be started in the tenon before being driven in. The bottom of the mortise is what forces the wedge into the tenon.
The top of the bench will be totally clean, no visible tenons.
So they were fox-wedged joints. The top of the build is not shown, so I thought they were wedged M&T.
Beautiful joinery that I will be practicing For an upcoming project so I thank you very much for sharing your work but I do have to ask is that carpet covering the floor of your Workshop
Thank you Mike! Good luck with your project.
As to the flooring, well I cannot reveal all of my secrets, now can I?