Hello and welcome to my blog! This post continues a series in which I’m building a pair of credenzas, one of American black walnut and the other American black cherry. In this post I will continue to focus on the cherry credenza by building drawers. The credenza has been accepted into ‘Works in Wood 2016’ by New Hope Arts.
While today’s post will focus on drawer building I wanted to note that I had decided to build a base for the credenza. The credenza will spend about a month at ‘Works in Wood’ where it will be for sale. A wall hung credenza has somewhat singular purpose and so to broaden the appeal I have decided that allowing the credenza to display a finished back panel and stand on its own four legs will increase its appeal to those who may want a credenza for use as a room divider in addition to those who may want to place it against a wall. Given that these two credenzas are now so different I will detail the walnut credenza in a separate but brief series, less some of the initial case building which has already been presented.
Along with my submission to New Hope Arts, I included a description of my work which I titled ‘Hikido’ for the show, playing up the sliding doors. I’ve included my description here for those interested in the details of the submission.
The title of my work is Hikido. Hikido are sliding doors of all style and function in Japan, including shoji and fusuma in addition to the sliding doors used in tansu and sashimono. I admire the sashimono-shi, who work by hand to create subtle masterworks which reveal their beauty and masterful design over a life long relationship with their user.
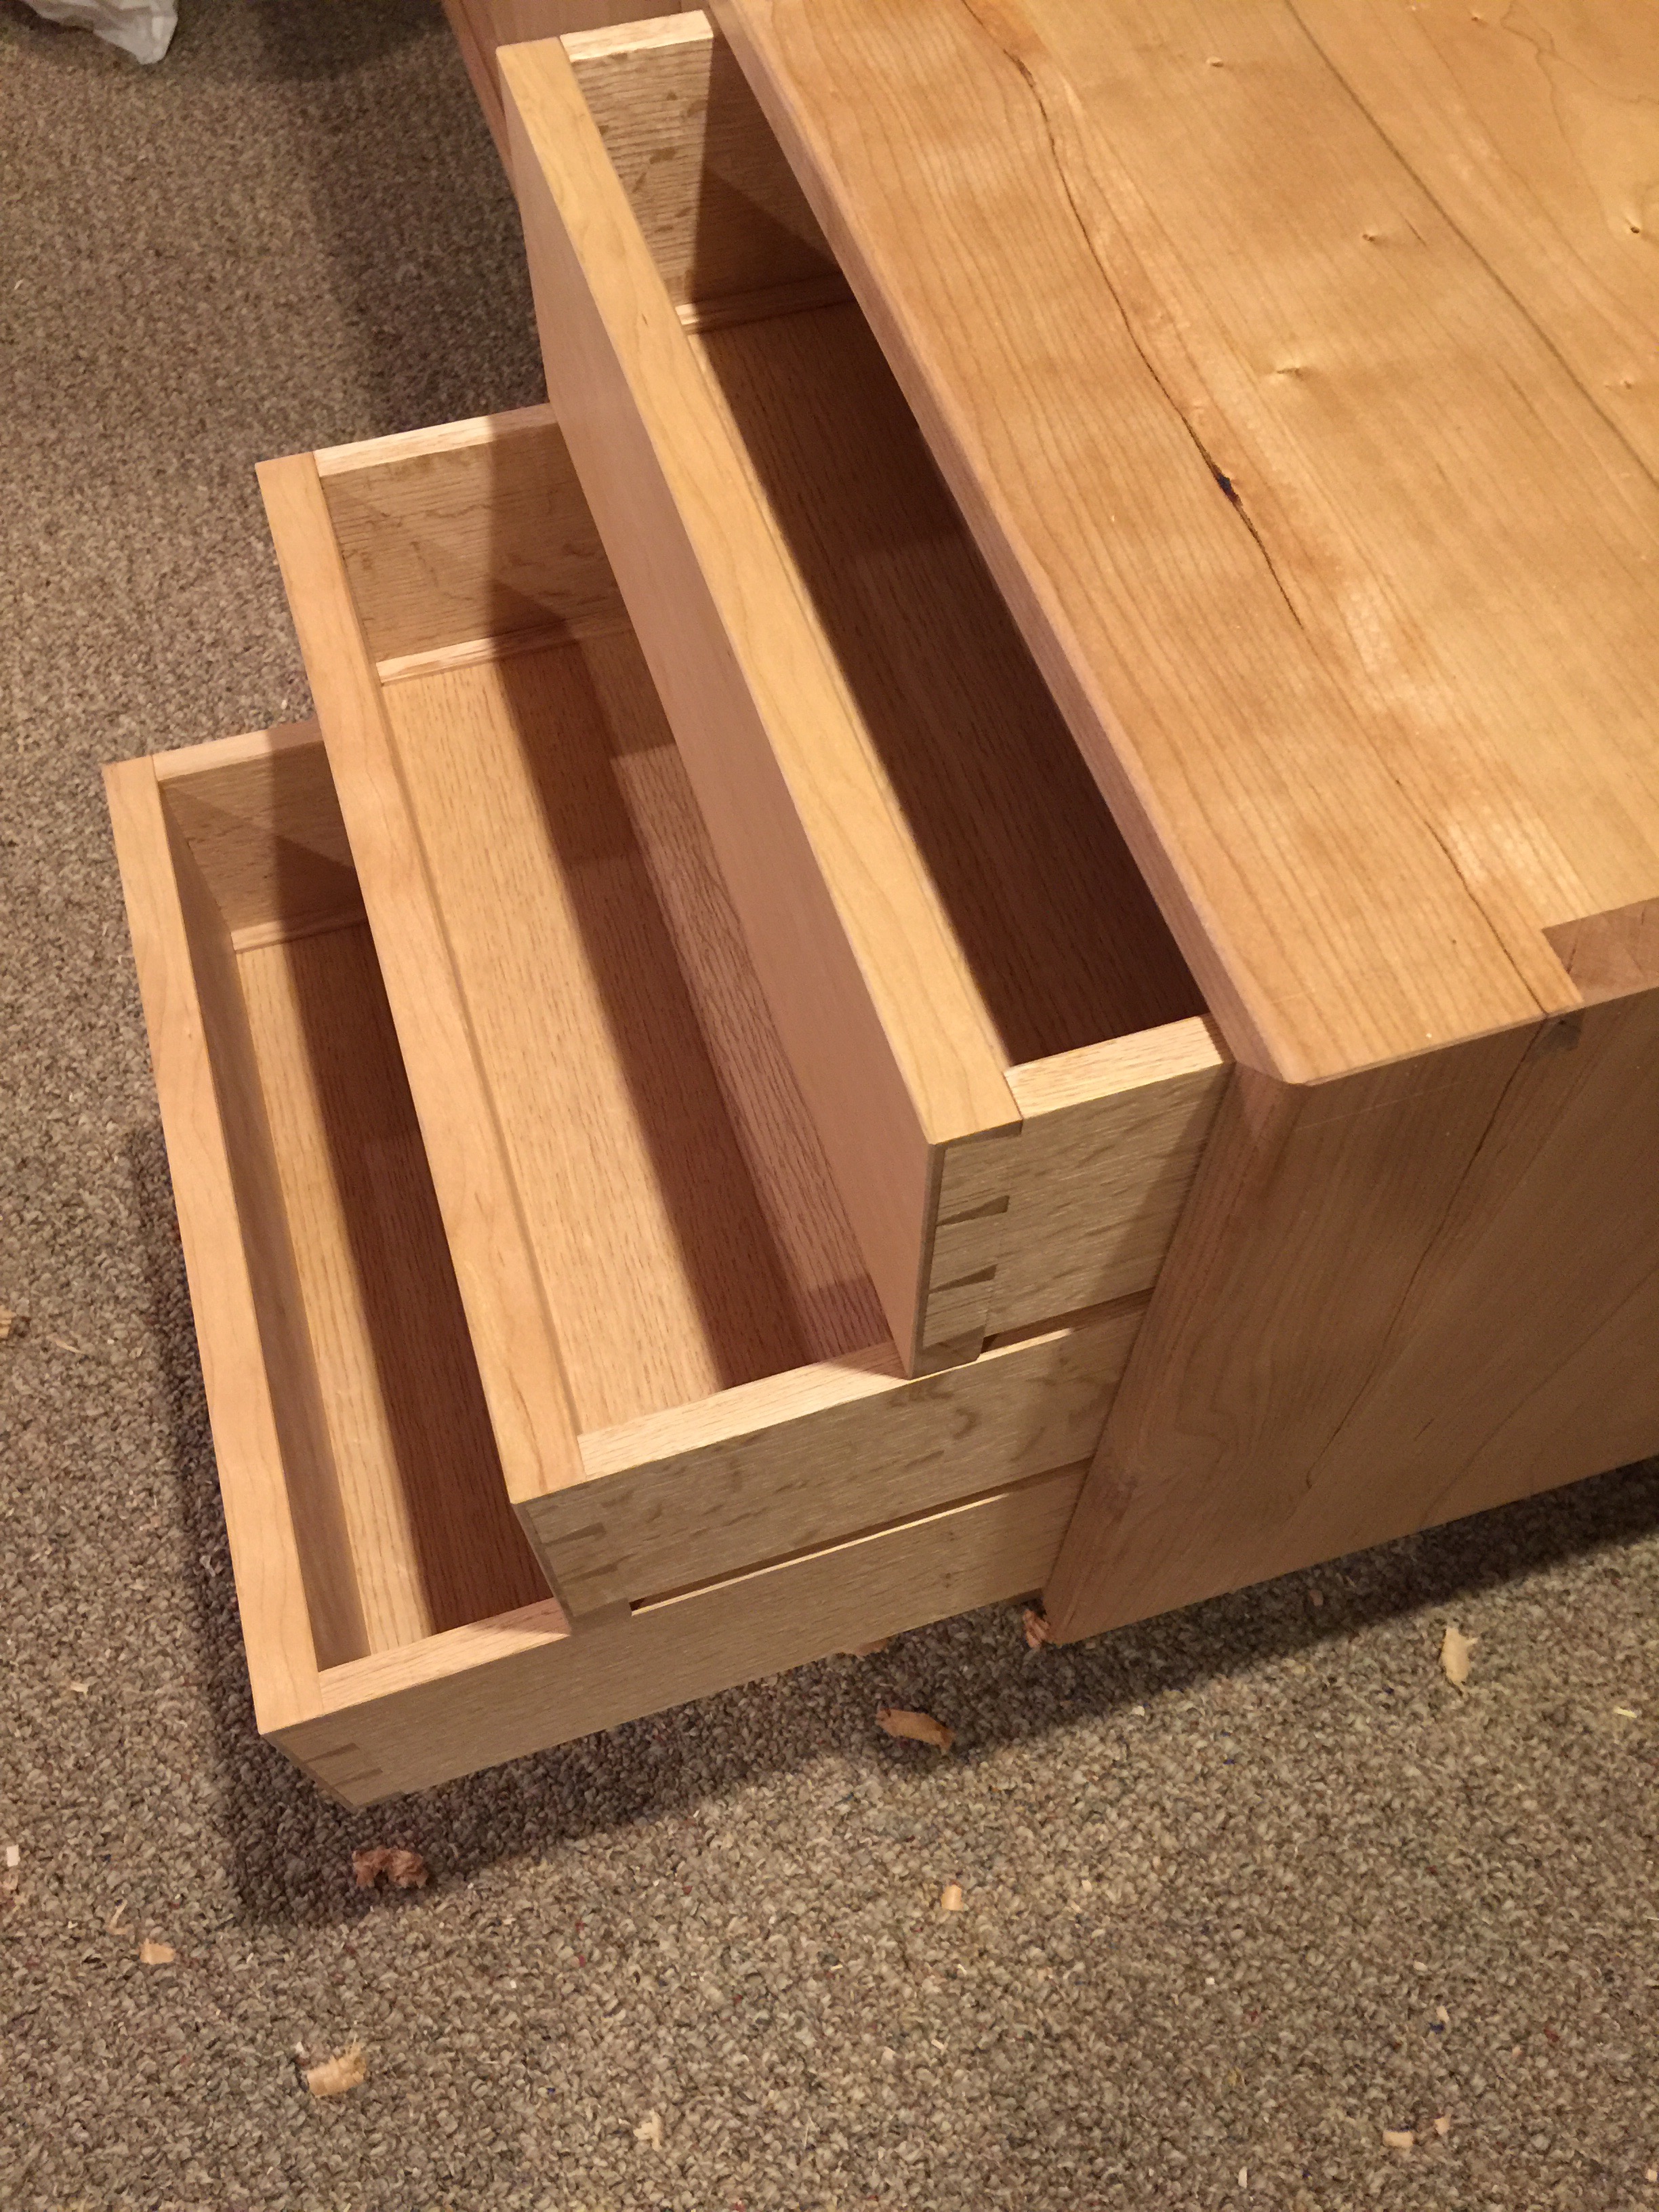
The credenza is made of American Black Cherry – the case is finished in blonde shellac and the stand stained black. The secondary wood is American red oak which lines the drawers. Details, such as the wedges used to seat the exposed tenons are made in Gaboon ebony. I carefully select quietly grained, slow growing and strong material to feature in my work. The wood chosen grows over decades and centuries, to respect such material one must create work that stands to last the test of time.
This credenza is made by hand and with hand tools from the beginning process of material preparation on through to joinery and finishing. Every joint cut with saws and chisels, every surface prepared with a series of hand planes. It is important to note that I do not sand my work, every surface offers the user to experience the subtle texture left by polished blade.
The drawers are made to a piston fit and glide on nothing more than their respective wooden surfaces, they offer centuries of use without maintenance beyond occasional application of wax.
Now returning to the build; I’ve detailed dovetails and drawer building in the very recent past during the Butler’s Desk build and given the short period of time that has passed I have decided to provide additional perspective by creating short videos. Each video covers a step of the process with exception to the final glue-up something I find impossible to record.
Introduction – Drawer Face Preparation
Drawer Side and Drawer Back Preparation
Tail Spacing and Layout
Sawing Drawer Sides
Coping Waste – Drawer Sides
Sawing Shoulders – Drawer Sides
Drawer Backs
Marking Drawer Face – Sawing Drawer Backs
Now that all of the parts are sawn, chopped and otherwise fitted I am prepared to begin assembly.

The assembled drawers are next planed along their outside corners to clean up any slight difference between tails and pins. The drawer, with glue still curing, is then placed into the case to finish curing. The case and drawer can be very near square individually, however if they’re just ever so slightly out of square at opposite corners the assembled unit will appear very much out of square. To counter this I adjust the drawer before the glue sets and place the drawer in the case. This is a rather time sensitive process and so I did not take photos of the process, only afterward.

The drawers are now complete but without bottoms. The bottoms will install into drawer slips. The slips are small strips of wood that have been grooved to accept the drawer bottoms. The reason for adding slips, rather than relying upon the drawer sides alone, is to increase the bearing surface of the drawer side.
Historical examples of drawers in Europe and America provide that drawer sides for cabinetry have ranged in thickness from approximately 1/4″ to 1/2″, with English makers often settling in around 3/8″ thickness. Thin drawer sides make a lighter drawer which should be easier on the case. However a thin drawer side also presents an issue, the thin piece of oak acts to saw its way into the drawer divider over years of use. This action results in a case which requires maintenance sooner than it otherwise should. To counter this a drawer slip is installed, this extra 1/2-3/4″ of material creates a bearing surface overall of approximately 1″ or more now riding on the drawer dividers. This additional bearing surface along with occasional application of wax allows many years of trouble free use.
Building drawer slips starts with first flattening and thicknessing material similar to that of the drawer sides, then applying grooves.


To align the sides properly with the grooves set into the drawer front a small stub tenon is cut into the drawer slip. The stub tenon extends from the groove in the drawer slip.
Some lingering material is cleaned up from the drawer grooves and the drawer slips are then chamfered on their inside edge and installed into the drawer.

Next the drawer bottoms are cut to size and installed into these grooves. The result is a drawer bottom captured on three sides and even thin material, such as 1/4″ thickness is very strong. The forth side is left to a single mounting point. This mount allows the drawer bottom to move with seasonal change in humidity without binding.

Finally the drawer handles are cut and attached, then the drawer depth is determined by stops placed behind the drawer. The drawer stops are simply short stubs attached to the drawer dividers and butted up against the back of the drawer at the intended location.


The drawer depth was set so that the drawers and forward most sliding door would be seated at the identical depth. They’re both located right behind the chamfered edge of the case bottom. The case bottom is setback 1/16″ to allow a continuous chamfer around all interior edges of the case and as such the case sides are proud of the drawers and door by approximately 1/8″.

I hope that you have enjoyed following along and I look forward to your comments.
Great stuff as usual.
I noticed that videos 7, 8, & 9 were HD, and it was a noticeable improvement. It’s nice to be able to see the details of the work you’re doing.
Thanks Brandon! I’ve finally figured out what was causing my video quality to diminish and have fixed it. They should be fairly clear from here on out.
Pingback: The Floating Credenza – Hikido | Brian Holcombe Woodworker
Pingback: Sliding Doors for the Floating Credenza - Brian Holcombe Woodworker