Hello and welcome to my blog! This post begins a series in which I will build a sitting bench of Honduran mahogany. The Tea Garden Bench will reside along a winding pathway of the tea house garden and will provide a place to sit briefly and take in the surroundings.
My goal in constructing this bench is to improve upon previous and similar builds, both in joinery and in execution of details. I first built this design in white oak, with the intention of placing it in my own small garden, but ultimately it found itself in the workshop. It has been there for some time allowing me to think about ways to improve upon it in all aspects.


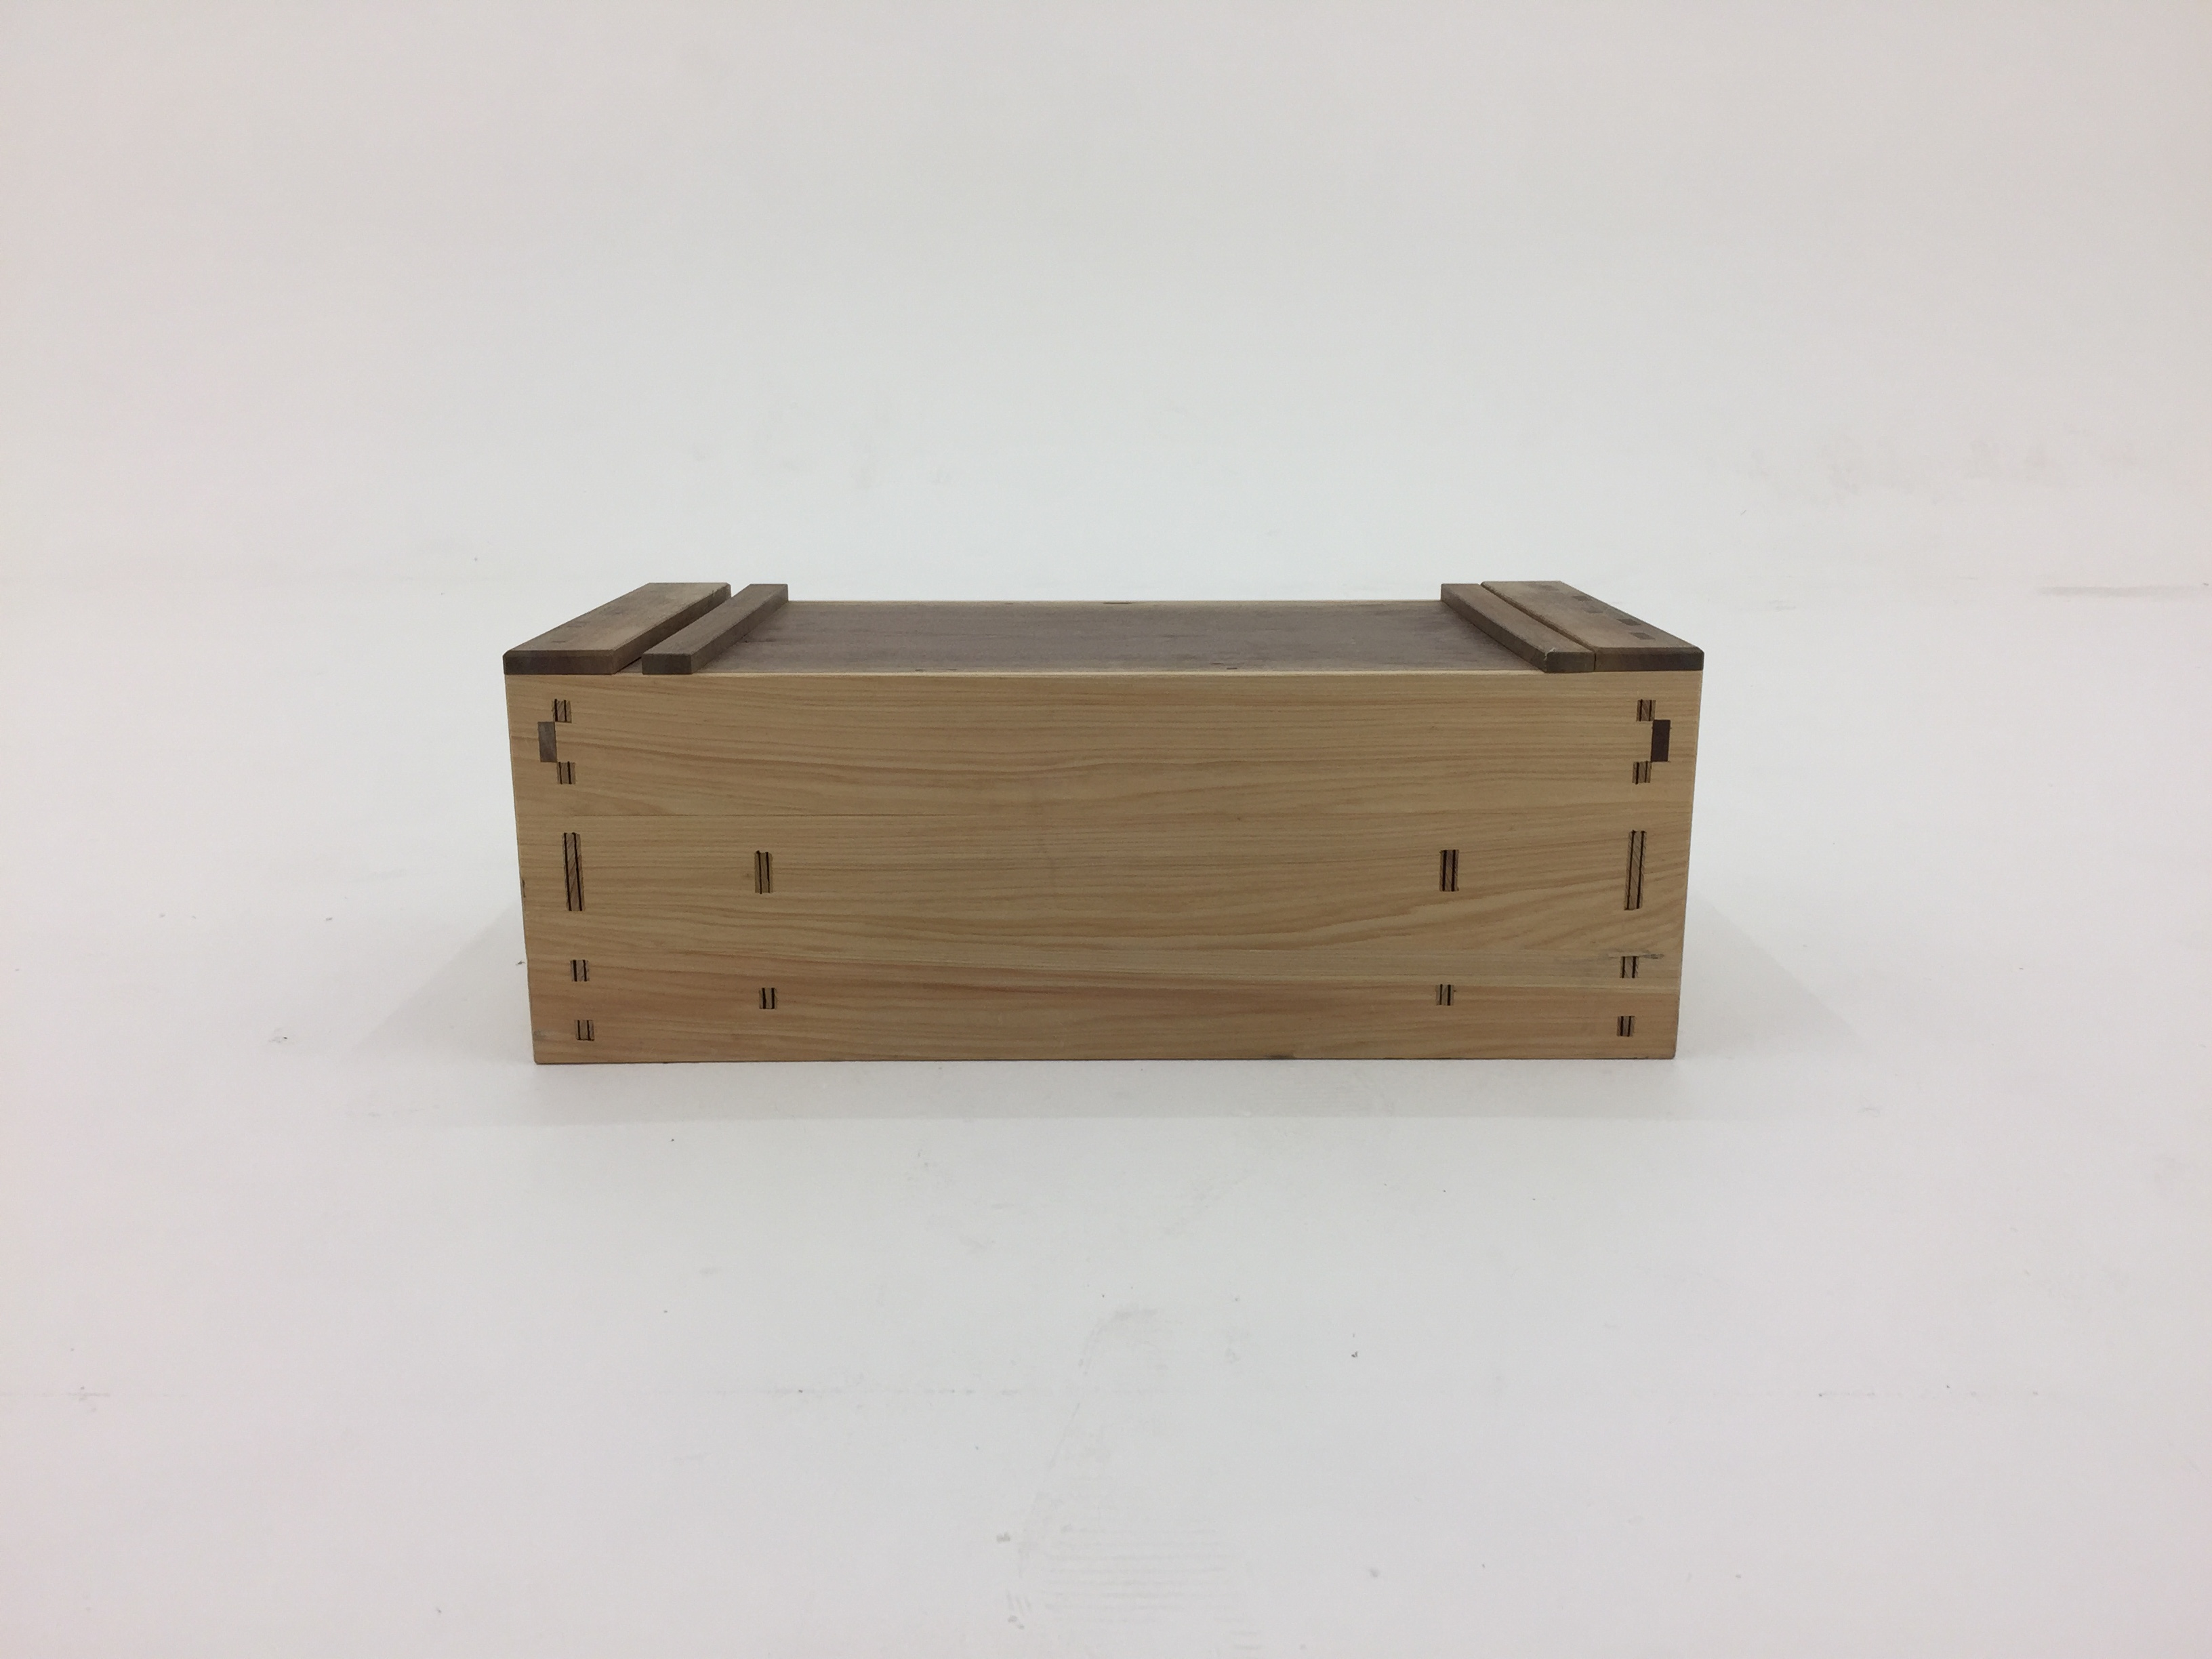
In creating this bench I utilized set-back dovetail joinery at the corners, wedged through tenons at the center upright and a full length stretcher. The stretcher features a through tenon with dovetailed keys at the ends and a joinery system of my design for the center upright.
The stretcher end joint relies upon a soft touch in its assembly and while it does lock tightly I decided to revisit that joint for this bench. Instead, I chose a joint that would be able to lock in a more permanent fashion, the keyed through tenon.


For the center upright, I have decided to replace the wedged through tenons with a blind version of the same joint. The blind version, known as Jigoku-hozo, or Hell-tenons, will seat with wedges and be otherwise invisible. Wedged through tenons that are otherwise exposed to the elements become uneven with the top and I fear may be uncomfortable or snag clothes, both things are something to avoid.
Finally, I will replace the joint that supports the center upright with a joint found in traditional Japanese carpentry. I will be utilizing a form a tsugi-te, or splicing joint, to bring the two sides of the stretcher together. More specifically I will be using a sao-tsugi, or rod tenon, to join the two halves. The type of rod tenon I plan to use is a sao-shachi-sen-tsugi, or wedged key rod tenon. I will detail this more specifically as I approach cutting out the joint. I’ve cut these joints in the past for Henry’s Bed. Chris Hall’s carpentry drawing series details these joints very specifically and is well worth the read for those who wish to understand these joints in detail.
My work begins by first acquiring the right materials. The splicing joint relies upon the use of material free of grain runout and so I had to be especially picky. My supplier’s only vertical grain Honduran Mahogany was available in the form of 12/4 stock, a slab’s worth to be specifc. Luckily I will have plenty of material for future leg stock. This material is too thick for my track saw and so I took to the bandsaw, working to ‘split the line’ as I cut.

After breaking down that stock to form two halves of the stretcher they were put aside to acclimatize. When heavy stock is broken down it must be given some time for the interior to adjust.
While that material rests I focused my attention on the main portion of the bench, utilizing a 9′ section of nearly 14″ wide 6/4 material. This material is rift sawn, showing radial grain along the majority of the board and flat grain along one edge. The 9′ section allowed me to create the bench from one continuous piece. My first task was to plan out the cross cuts and break the slab down from 9′ into a 6′ main section and two adjoining 18″ sections. The slab, being just over 9′, allowed me to trim the ends, a required step in prepping rough lumber.

My next task was to joint the center section of the slab, creating a reference face. The slab was in very nice condition and so my work required only that of the try plane to remove the bow and slight twist present in the material.
The resulting slab is now flat and true on one face.

Next, I repeat the same jointing process on the two side pieces. As I worked these two pieces I came across a few areas to repair. The first area, a large crack stemming from a bark inclusion in the wood. I do not want rainwater running through the crack and so I thought it best to cut out the crack and join in new material. I was careful to match the grain direction on the spline to ensure that the joint would be able to move in exactly the same direction over the course of the seasons.

Shown here I am flattening the floor of this joint using a western router plane. A evenly decked floor will allow good glue contact along the interior of the joint.

Once the adjoining piece was in place, the joint was finish planed and shows how well it will disappear in use. It is very common in timber carpentry work to see stock repaired in a fashion much like this, especially when working with materials that have become quite rare, such as this Honduran mahogany. These repairs help to keep this material functioning to the peak of its ability, and these repairs wear very well.

The crack transfers through the wood and reveals itself on the bottom of the board. This gave me an opportunity to install a locking key. The locking key is used to prevent the two halves from working apart.

I decided to put one of these keys at each corner, allowing me to utilize them later for attaching the brass feet. The joint runs crossgrain and provides quite a deal of long grain glue contact.

To complete the prepping stage and move onto joinery, I must next surface the opposing face of this stock. I’m starting that work with the top board, first marking out the intended thickness.

Then working with first my jack plane, followed by the try plane to thickness this board. I’ve decided to use this face as my reference and so I’m checking it with winding sticks to ensure that it is accurately flat.

With the stock prep now complete, I can begin cutting joinery, a step I will continue in the next blog post in this series.

I hope that you have enjoyed following along, and I very much look forward to reading your comments posted below.
Another fantastic post Brian, great tips on the repairs. What do plan on doing with this bench.
Thanks Salko! This is for a client, so he will use it in his garden.
As always your work is outstanding! 6 stars mate.
Brian,
Your words are as descriptively simple as you pictures are beautiful. However, neither the words or the pictures math the elegance of the finished product.
Jim
Thank you Jim! Much appreciated!
Brian,
Apologies for my sloppily worded message. Either I need to learn to spell or to use spell-check, probably both. Here is another attempt at conveying my ideas. Your words are as deceptively simple as your pictures are beautifully descriptive. However, the words nor the pictures match the elegance of your finished products.
Regards,
Jim
Jim, no worries, I very much appreciate the sentiment expressed in your comments! Thanks again!
Thank you. Was a delightful post. Looking forward to updates. So far I have be truing up all my wood by hand (though on much smaller pieces). I can appreciate the effort it takes as well as the satisfaction at the end.
Thank you Joe! It is often a very enjoyable process and always a good workout.
Hello Brian!
I don’t take the time to respond to most of your updates – I simply sit back and enjoy them – but I’ll make an exception for this one. I am in awe of the the elegant simplicity of this project.
With warm regards, Jim
>
Hi Jim, Good to hear from you and I’m glad that you have been following along with interest. Thank you for your comment, much appreciated!
Best Regards,
Brian