Welcome to my blog! This post begins a series, The Floating Credenza, in which I will build two wall hanging credenzas. One credenza of American black walnut and the other of American black cherry. These two cabinets will be similar in stature, both will feature sliding doors. The black cherry cabinet will have the additional feature of three drawers
I built a similar wall hanging credenza approximately four years ago. I use the finished product daily, so I’ve had some time to think about what I would change. The credenza serves me well, but there are refinements I will make to improve upon and further define my aesthetic.

The first of those changes is to miter the corner edge of the dovetails, allowing for continuous detailing along the edges.


The doors on the previous wall hanging credenza were made using high quality plywood veneered with maple burl. These cabinets will feature solid wood doors, constructed similarly to the door I created for the Medicine Cabinet series, utilizing dovetailed battens mortised into full sized stiles and capped with thin rails. The panel will be flush to the frame just as the Medicine cabinet door panel is flush to its frame.


On that same note I will be using very subtle wood grain for the doors, vertical grain or a similarly quiet grain pattern. I have been moving away from such bold statements as those made by book matched maple burl.
The wall hanging cabinet pictured above uses a dado joint to connect the case bottom to the sides which is reinforced with dowels. That joint is doing its job just fine but I now prefer to hide half-blind dovetails under the case, eliminating those dowels from the exterior case and allowing the case bottom to be setback from the case sides along the front edge. That ledge will be chamfered and the cabinet will now feature continuous chamfers on all edges.
I’m building two cabinets, one in cherry and the other in walnut and I may show both as I progress through the work but I will focus on the cherry cabinet for the majority of the work.
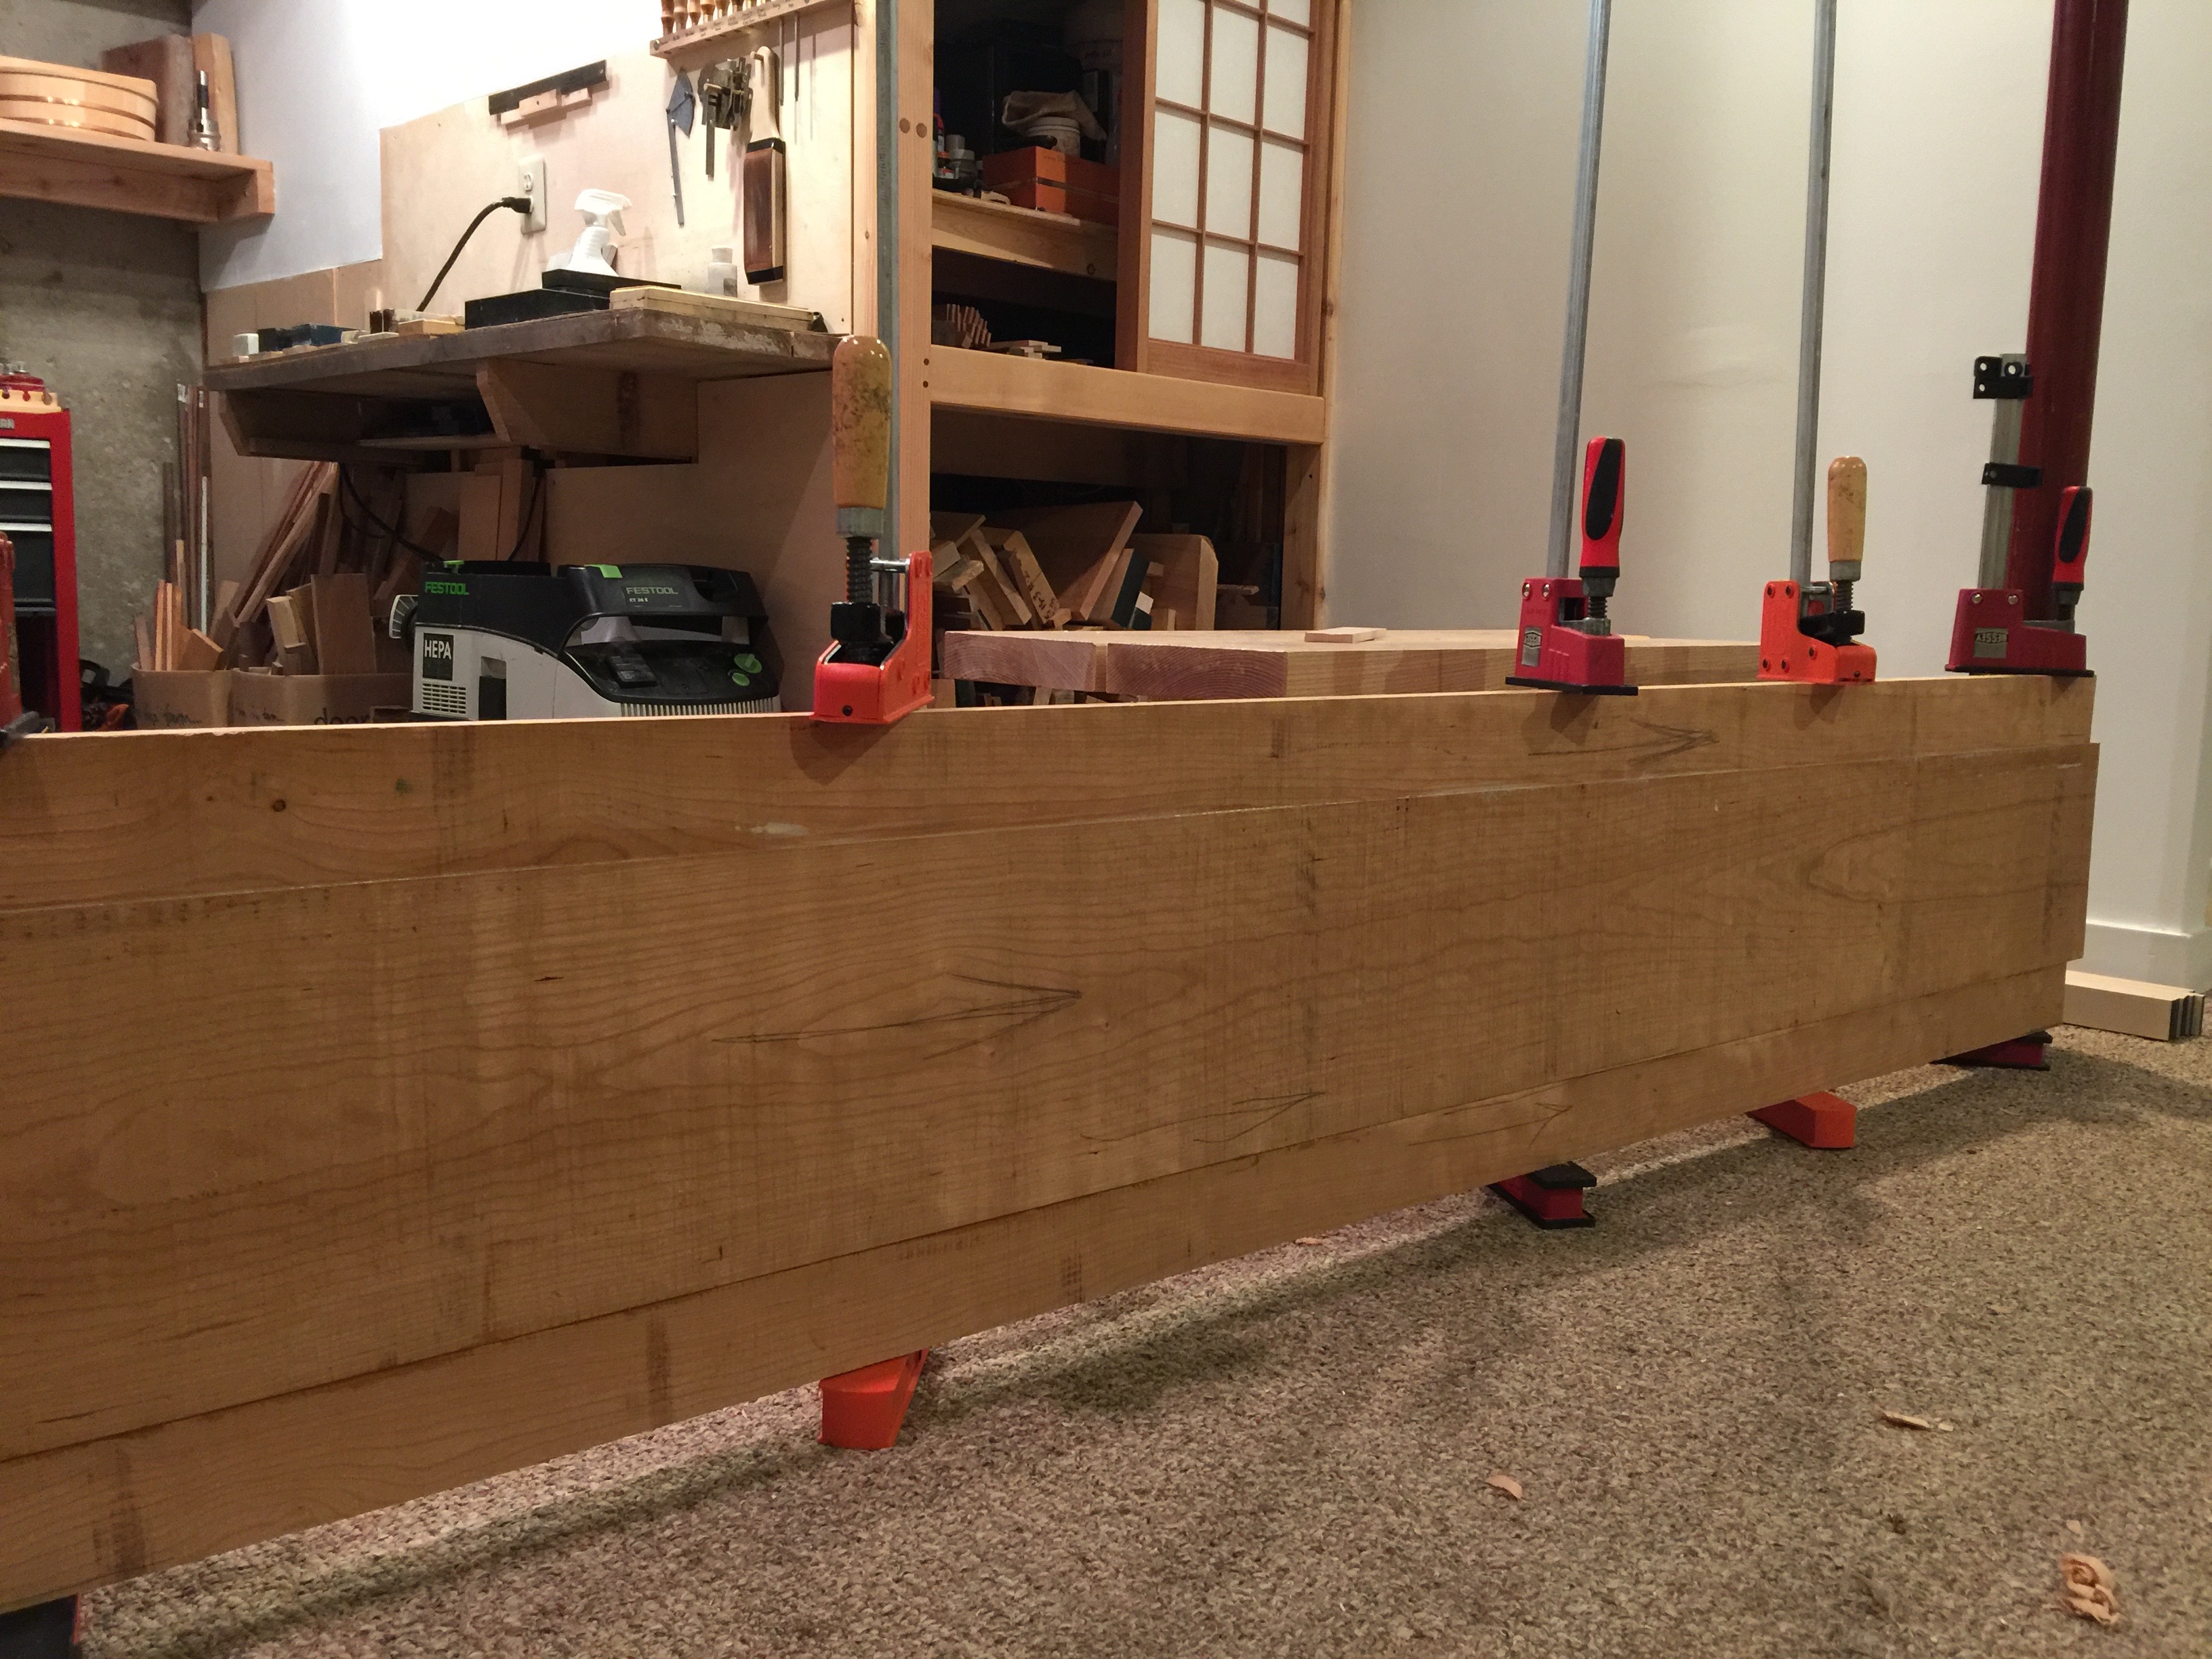
The material I have selected for the case exterior on this cabinet is flat sawn at about 10″ wide. The overall depth of the cherry cabinet will need to be 16″ and so I’ve selected a sequenced board to extend the width of this board and form a panel. Rather than book matching the boards to form the case, I have cut the sequenced board to remove the the rift sawn edges which I will then use to make up the width.

To join up a board that will be face jointed by hand, I begin by jointing the edges independent of the board faces, using a square to check at one location then using winding sticks to align the edge. This allows me to work a full panel when finished and take nearly equal amounts off both sides as I bring the board to thickness.

I begin work along this edge with the jack plane, followed by the try plane.


After removing wind from the edge, I place my precision level on the edge to check for flatness. I want a straight flat edge, not one that is especially hollow.

My final passes are with the LN 7, taking a full length shaving.

The matching board has been jointed as well then the pair are put together and checked for gaps.

I apply arrows to the board faces pointing in the direction of rising grain so that I can make sure to align everything properly during the glue up.


The board is now glued and ready for face jointing.

I use longer precision steel winding sticks to check for twist along the case.

The first plane I work with is the jack plane. I wanted to contrast my efforts to the Butler’s Desk and so this time around I did all of the rough work along the grain, rather than across the grain. I believe it was slightly faster going long grain.

Shown here I’m using my straight edge and working in 3′ sections.

An up close look at the glue joint reveals a nearly invisible glue line.

The face is now jointed, and smoothed. You can begin to see the subtleties of the grain pattern in this otherwise quiet board. The slight curl in the surface really shows through after finish planing.

Cherry planes wonderfully, this photo shows how smooth the surface is after finish planing, smooth enough to show a reflection of the shop.

These long panels will be cut to become the case top and sides making a continuous run on the visible exterior of the case. The case bottoms, however, are their own separate panels. I’ve glued them up from material that matches the top as closely as possible.

Here the cherry case bottom is being face jointed, the board is also constructed of a flat sawn center joined to rift sawn edges.

After the boards are planed for thickness and then finished planed, they are then jointed along the their front edge and brought to a finished width. Rather than saw the boards to width, I use a jack plane set for extremely heavy shavings and remove the 1/4″ of material in a few strokes.

After the panels are edge jointed and brought to size, I am able to layout the saw cuts I have planned. I have left a bit of extra material on these panels, this allows me to place the finished layout on the panel strategically avoiding highly figured grain at the corner joints.
Highly figured grain is weaker than straight grain but it can make for an interesting case exterior.

That’s all for now, I hope that you will enjoy following along with this build and look forward to your comments.
Continue onto the case joinery;
The Floating Credenza – Dovetails
Brian,
Excited to see this build unfold! The original credenza looks beautiful and quite functional, I’m looking forward to seeing the improvements you have in mind and ‘improved’ construction methods.
With your recent series on setting up a kanna and participation in the planing competition, I’m curious about your thoughts on where you have found it best to employ Japanese handplanes in your work vs your western ones. Do you find the kanna best for final smoothing operations and the jack and try planes easier in the western style for the heavier work?
Thanks again for sharing, it’s great to get to share in your journey and see your style and techniques evolve. Looking forward to more!
Jonathan
Hi Jonathan,
Thank you! Glad to hear that you will be following along.
Excellent question, I tend to use Kanna as finish planes, having two of them setup specifically for that purpose. This cabinet will need to be finish planed again, and that will occur with Japanese planes, that final planing session will brighten up the cabinet further.
I am very familiar with the western planes that I use and like using them quite a bit, they’re intuitive and do the job exceptionally well.
Western wooden planes and Kanna are more similar than different in my opinion.
Cheers
Brian
Is that carpet I see, how do you find vacuuming all those shavings or do you have a vacuum with a fairly large diameter hose with good suction power. I have a shop vac with a standard hose so the shavings always get jammed and I’m pretty much sick of it.
The build looks exciting and I’m going to eagerly follow your progress, I’m certain your going to make it look beautiful. I also agree that a dovetailed mitered corner will look much better even though the through dovetails you currently have look good also but the continual flow would elevate the elegance of your piece.. Have you decided what type of finish your going to apply. Good luck.
Hah, yeah the carpet has benefits and drawbacks. The big benefit is that I can flip case goods around without concern for scratching them. I pick up most of the shavings and toss them out, then vacuum up the rest. I have a festool vacuum that is pretty good.
Thank you! I was shy on mitered corners at the time of the original build, so I’m glad to be able to put them to use currently. It adds some difficulty but also allows for me to cut grooves in the front and back of the case through and through without stopping the groove.
Most likely I will use shellac on this piece, I’ve been leaning heavily toward shellac lately.
Beautiful! How does the cabinet mount to the wall? French cleat? How does the cleat attach to the back of the cabinet?
Thanks Joel! My plans are evolving a bit, I will detail both what I do with the walnut cabinet (french cleat) and what I end up doing with the cherry cabinet.
Brian, how did you end up haning the walnut cabinet?
HI Joel, Good to hear from you. The walnut cabinet is not yet due, but I’m working on it currently and have planned a french cleat.