Hello and welcome to my blog! This series begins a build in which I’m creating custom kitchen cabinetry. Kitchen cabinets are a significant departure from my usual work, but my shoji client, pleased with my efforts, has encouraged me to take on the job. The homeowner in this case is himself a very capable person with much experience in the trades and so was willing to do the rough framing work that I do not do as a cabinet maker. Cabinet makers make cabinets and installers do the demolition, rough framing and other work associated with putting the cabinets in place.
The initial phase of this project was to create a cabinet to house a dishwasher in an unusual fashion. This kitchen of this mid-century home is organized in a way which did not allow for a dishwasher, but it did have a deep pantry. A deep pantry that was providing very little in the way of storage space as deep cabinets are something unfortunate. Everything at the front is immediately found and everything in the back is long forgotten. The client had determined that the best use of this cabinet would be to install a dishwasher, and use the free space above it as storage utilizing deep pull-out drawers. The dishwasher would need to be raised from the floor to accommodate the top of an intersecting stairwell.
Considering the nature of this build I thought it best to create a frame which could be set in place of the previous door frame. Rather than build out a cabinet box, the closet would be taken back to the studs, then framed to accommodate a plywood interior that would carry the drawers and allow fixing positions for the cabinet frame.
Building the cabinet frame started by prepping white oak and joining an interior frame which would act as the foundation for the exterior frame. The interior frame was joined with dovetails. These dovetails will be hidden away in use.

This was followed by created an outside frame. This frame, while it is on the face of the cabinet is not quite the same as a ‘face frame’ cabinet which generally refers to a plywood box with a wooden face.

The frame is built using a combination of mortise and tenon and bridle joints. The center joints are deeply cut blind mortise and tenon and the outside joints are open bridle joints. I wanted to give some minor hint that this is not typical cabinetry.

The interior frame is then set into place, the end joints scribed and cut. The cabinet is next glued up to join it together. I worked carefully to ensure that I would be able to chamfer inside edges and make for an enjoyable experience when opening the cabinet to reveal the interior.

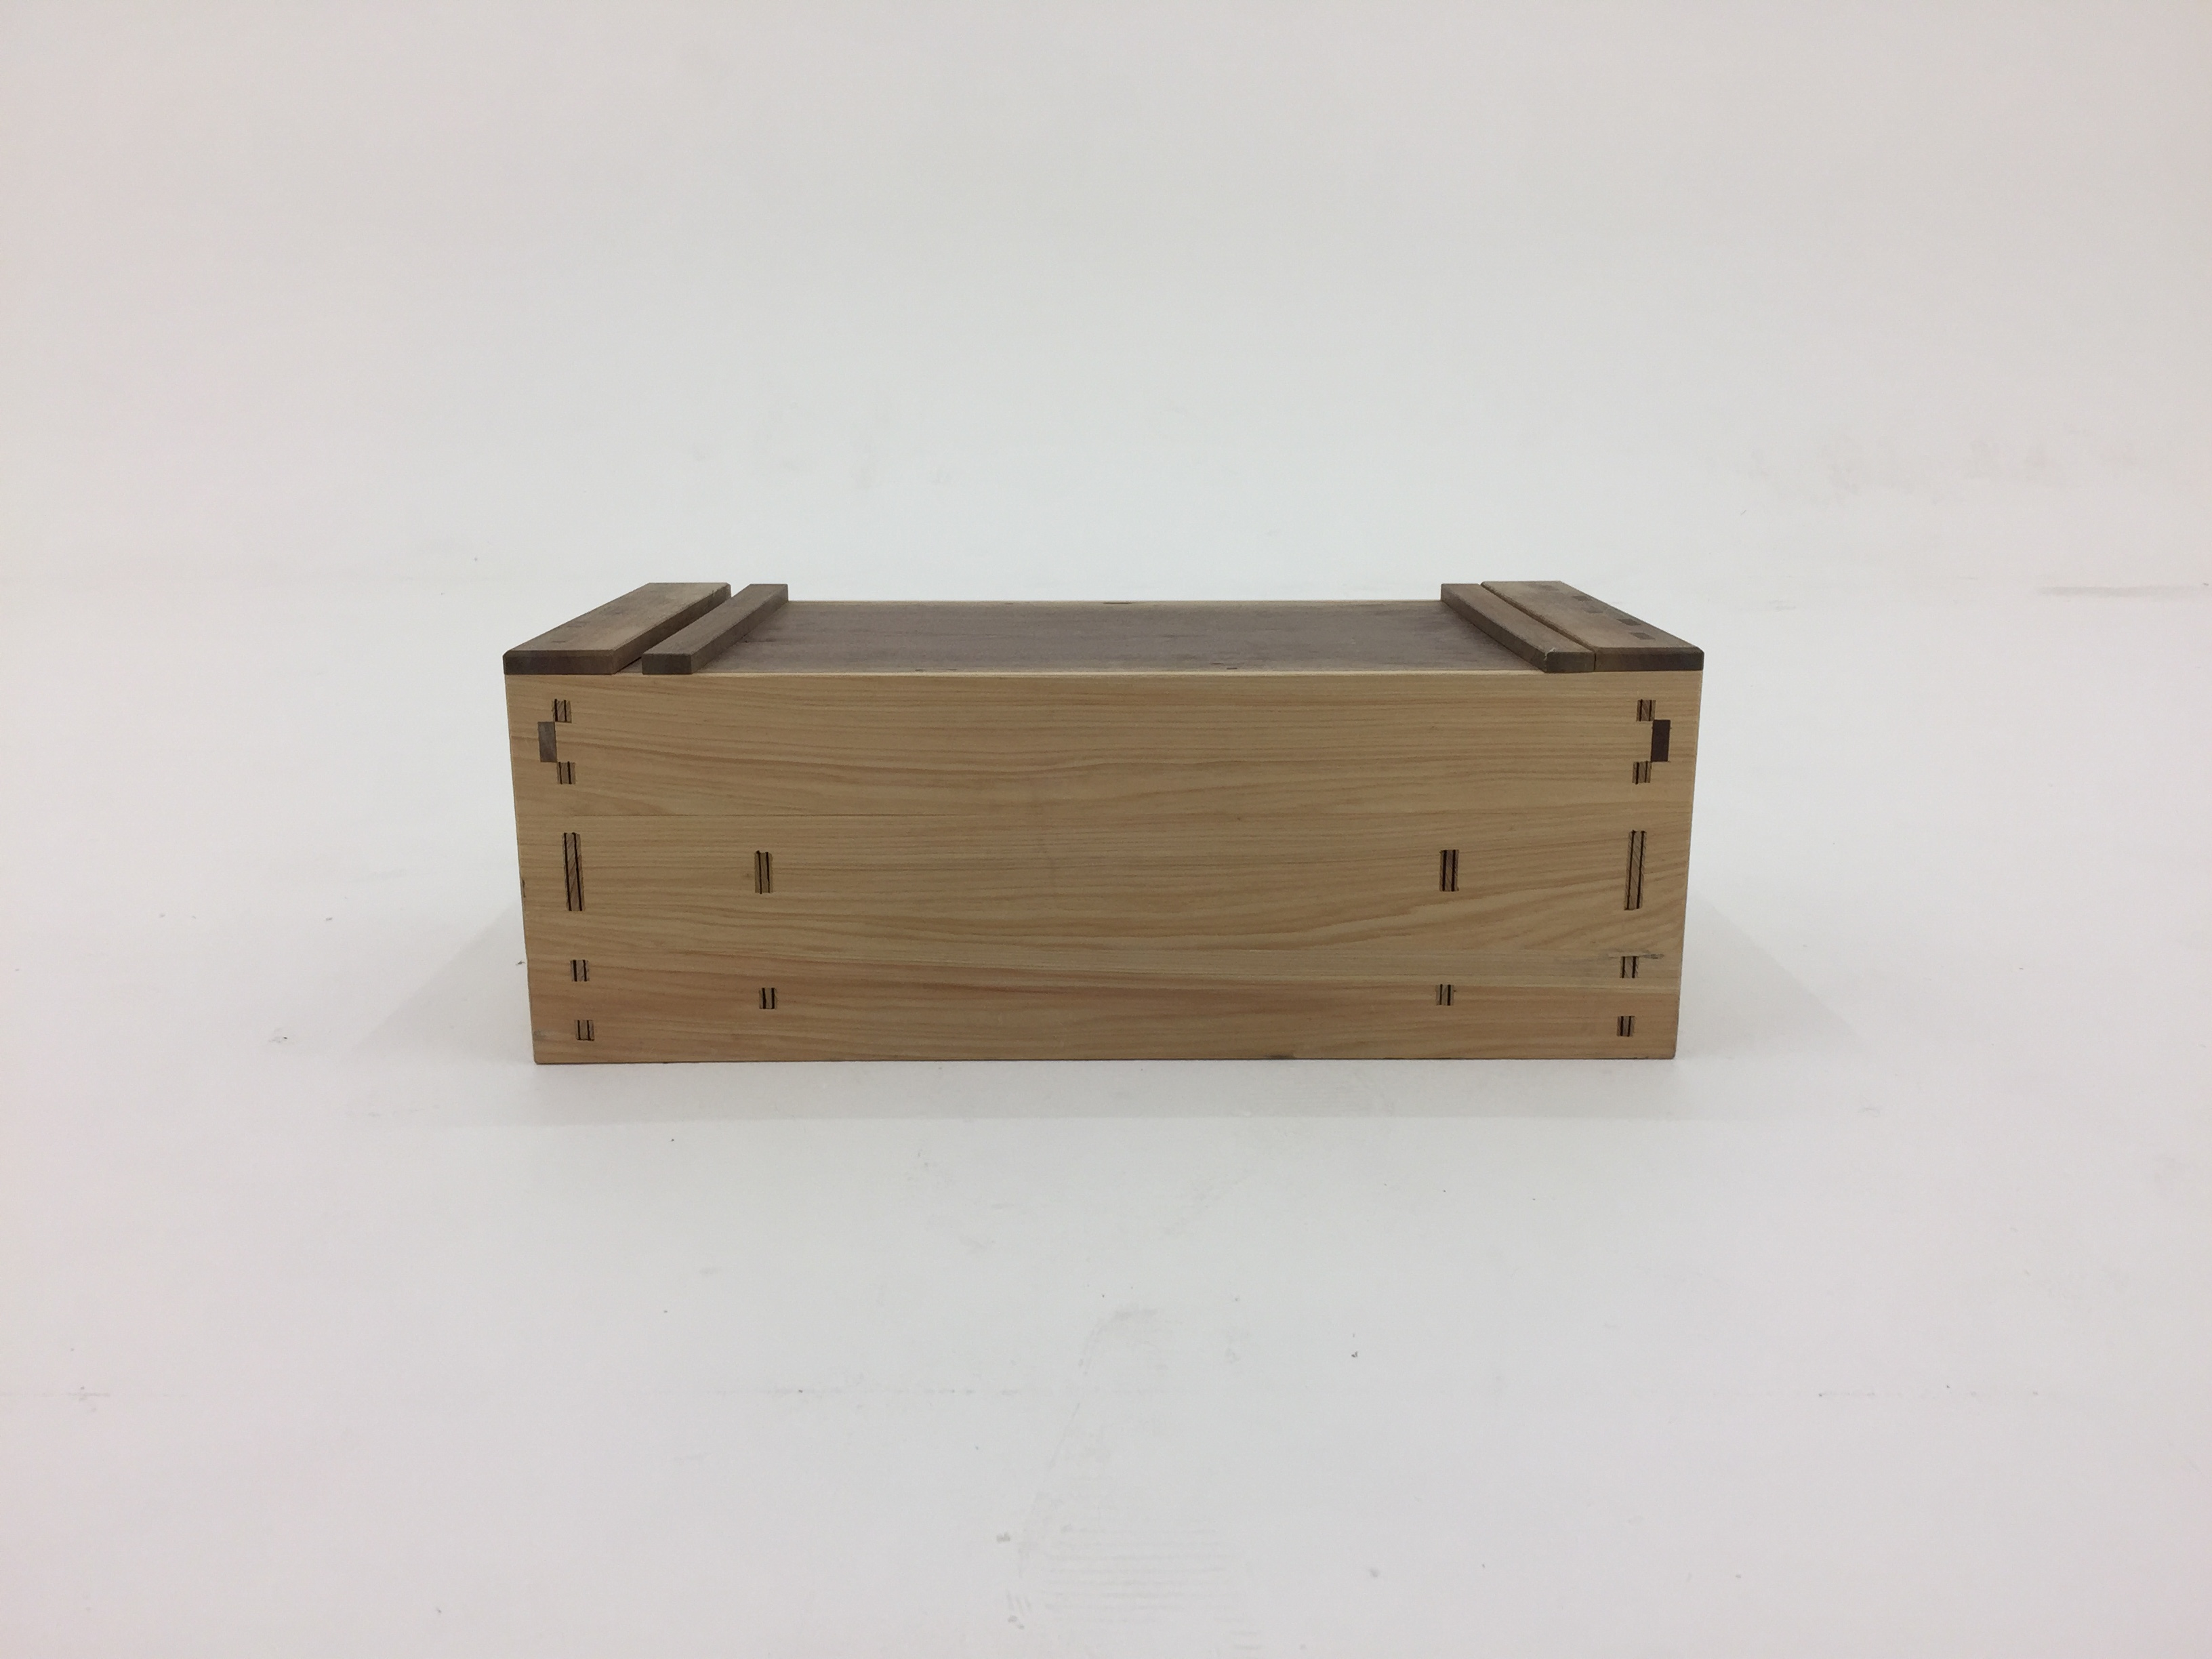
The finished frame, with both uprights now in place and a solid wood panel installed at the bottom.

Any uneven sections were planed flush.

The original pantry now removed, making way for the new framing and interior paneling.

The interior was covered in birch plywood to level out uneven surfaces and to make for a clean appearance. The cabinet was then installed in place. The installation is not finished at this point, but nears completion.


Finally trim pieces were made for beneath the dishwasher and the drawers were installed.
At this point the client determined that they would like to change the remainder of the kitchen to match. A door style had been selected to match the existing cabinetry but ultimately scraped to make way for what will follow. A door of my creation will instead be installed once the remainder of the kitchen is complete and a uniform facade determined. It makes the most efficient use of time to build all of the upper doors at the same time.
The homeowners had not intended to change the cabinetry in the entirety of the kitchen at the start of this, so they have in place a counter top which they would like to keep, but one which cannot be removed without chancing its destruction. So most other cabinet makers interviewed for this project were not interested. I like a bit of a challenge, so while I had some hesitations, ultimately I felt it was not so impossible.

Here, the drawer fully extended, this provides a good bit of accessible storage and will (eventually) be neatly tucked away behind a door.

The drawers are dovetailed at all corners, rather than applying an additional front panel, I set the dovetails in from the sides.


While the single cabinet could be easily created using only my paper sketchpad, the remainder of the kitchen needed a bit more consideration. I drew up some plans for what I would be building next in Sketchup.


The lower cabinets are ‘frameless’ cabinets. Frameless cabinets hide the frame behind drawers and doors that create the facade. The drawer faces and door fronts are made typically in a substrate material and a veneer face is applied. In this case I determined that I will use furniture grade baltic birch ply edged in solid wood and I would apply shop sawn veneers to create the doors and drawers.
The primary benefit of using shop sawn veneers is that I can create a uniform and matching facade that also happens to be unique in appearance. Shop sawn veneers allow me to work without the need to rely upon commercial veneers and I can cut my veneer thick enough that I can plane the panels to a finish. I sourced a live sawn slab of white oak the full width of the major door and drawer fronts that would be sawn into veneers.

I started working the flitch by first cutting one edge.

Followed by face jointing.

Then I sawed the board into veneers. These would be about 1/8-3/32″ thick. I sawed enough to cover the interior facade, less the cabinet end caps. I specifically went for flat sawn material that would offer some character to the finished product but without showing the appearance of ‘cathedral grain’ door fronts that are very common. If I were using quarter sawn material, I would see eighteen matching veneers which seemed a bit overwhelming. Using flat sawn I can create a facade which appears as seven veneers.

The plywood was next cut to size, then set aside. The facade would need to wait until the cabinetry was installed to make certain of final finished dimensions. I’m using high quality baltic birch with a birch veneer core.

Most veneered doors are constructed using MDF as a substrate. The MDF is veneered back and front then edge banded. This construction is fine so long as it is never damaged, but the moment it is damaged it needs to be replaced as its difficult to repair to any sort of match in quality.
I will not be edge banding, instead I will use solid wood edging, mitered at the corners. The veneer is shop sawn at 3/32″~ thickness and will be planed to a finish, it will not damage easily, in fact it’s not far off of engineered flooring in terms of construction. This should provide some context as to the differences present in similarly termed construction methods.

The facade, and materials to construct it, are set aside. Returning to the installation front, the original cabinetry had been removed and existing counter top braced as it would be retained.
I created a system that would hold the cabinet interior structure using white ash frames that would be grooved to accept 3/4″ plywood cabinet sides and rabbeted to hold the cabinet bottoms. The system would join into itself using bridle joints and would be able to fastened to the supporting frame work installed by the framer. I also designed a plinth to raise this from the floor level and provide a toe space. Every part is made integral through the use of joinery.


Here the frames are being glued up, after which I planed them along their edges to true them up.

Shown here I’ve mocked up one end of one cabinet.

Next they are set up under the counter tops, this is a careful operation being that the counter tops are already in place. The frames are installed, followed by the plywood uprights which fit exactly. The framing work was covered also with baltic birch ply along the inside corners where the two cabinets meet, this is done to allow full support to the oak uprights which will join up along that same inside corner, they will do so without glue.

With the boxes in place I can now shim out the backs to close the seams tightly. All of the moldings are being held from the inside with cabinet screws to eliminate fasteners showing on the facade, even finish nails.
The frames are grooved along the inside to allow plywood bottoms to be installed flush into the cabinetry. The bottom plinth will be filled with an insulating material.

I’ve started the floor level moldings, which I’ve cut from quarter sawn material, these are being attached from the backside so that they will not reveal any fasteners. This will also allow for very easy removal should the floor require work at some point.


With the boxes in place, I can now take exact measurements for the uprights and other members of the facade. I’m working the facade around a joined construction which will allow the entire cabinet system to be easily disassembled should it need to be refinished at some future point.
Here I’m cutting a tenon which will fit into a mortise cut into the to frame member.

As I build the facade I work to neatly seal up the cabinet work, it has taken some planing since this cannot be made like typical cabinetry. On the end that will sit beside the stove I’ve determined that I will cap it off by creating a panel that will be tongued on two sides and fit into grooves cut into the supporting frame work. The panel will then be anchored in place and will be able to be removed in the future should such a need arise.
I’ve constructed the panel similar to how I will construct the remainder of the facade, I started by sawing veneers, then edged birch ply in quarter sawn oak solid wood edging and finally applied the veneers. In preparation for the remainder of the work, the panel was finish planed.

This panel will not show edges and so these was no need to miter the corners.

The panel is then fitted roughly into place. The remainder of the trim can then be worked in around it.

Finally I can cap off the remainder of the trim work.

The interior of the cabinets are nearing completion with only a few details left to attend to. The area that surrounds the plumbing will be attended to by an interior frame and the back of the stove area cabinet will be finished off, as well the final piece of trim at the bottom will be put into place.
The trim is fitted but has not been glued where it meets the edges, this will occur prior to the final assembly but I want to keep everything as easily removable as possible until then. Once the facade is created and the drawers begin falling into place I can then feel comfortable gluing the trim work.

Thank you for following along, and I look forward to your comments.
Well done Brian!
Thank you Salko!
Bro you deserve it
Brian,
You do beautiful work. I wish we knew of your talent before we bought and furnished our house.
Kim
Hi Kim,
Great to hear from you! Thank you kindly! Anytime you both are in Princeton let me know, I’m happy to give a tour of my studio.
Best Regards
Brian
how did you sawn those veneers? Handsaw? Framesaw? Seams very daunting using hand tools for this task.
Hi Greg, I use a large bandsaw for that.
Nice work Brian! Very cool to see your approach!
Thank you! Much appreciated!
You have an amazing gift of “vision”, young man!
Thank you!!
Given the lifeless and prefinished pdf/chipboard/melamine I have had to just install on a job I would take your option any day Brian, it knocks the pants off flatpack! The only grace I had was a finger jointed and laminated bench top of jarrah which I could fit rather than the laminex option. Really interested to see how the build unfolds. The different considerations due to being in different countries are interesting too. Are they polished granite bench tops ? Fair bit of weight and they really dislike being shifted. Does the birch ply handle water from say a burst hose or leaking waste pipe? I seem to consistently deal with soggy mattresses of manufactured board in cabinets that are not designed to be repaired or pulled apart short of demolition 😉
Thanks Gav! Nice to hear from you and appreciate the feedback. The countertops are actually a quartz veneer over the existing countertops (MDF with some kind of laminate) and so they could take a little bit of moving around but not much.
Not sure anything will handle a burst pipe with success, but I will finish the interior plywood in poly to give some water resistance and I’ve made the bottom panels easily replaceable. There will be drawers in the area to allow for easy access to cleaning supplies, not sure how they would fair, but they’ll be made from white oak and finish planed so they may fair OK.